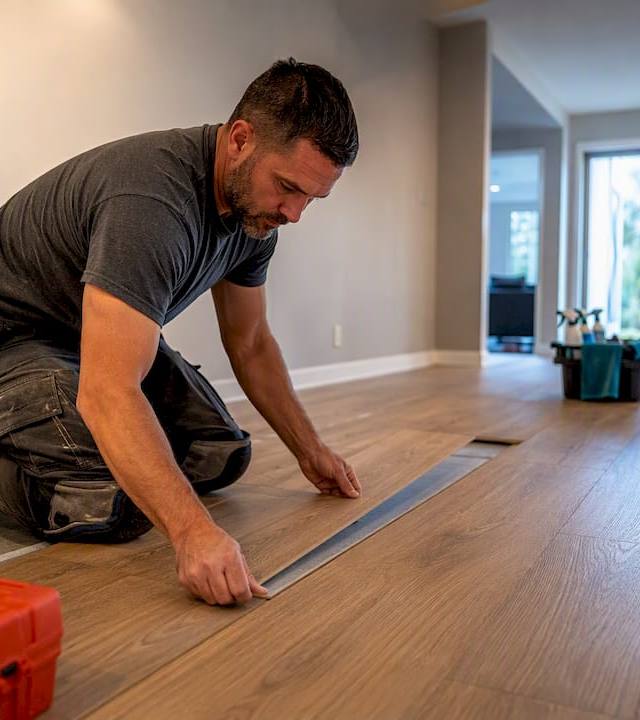
Avoid a Failed Delivery: Tilt Fit Math for Doorway Clearance in Naples

Avoid a Failed Delivery: Tilt Fit Math for Doorway Clearance in Naples
Measure the doorway’s clear opening, then measure the item’s two smallest cross-section dimensions, not the largest. Run a diagonal tilt check comparing those numbers against the doorway’s width, height, and diagonal. If the margin is under 2 inches, use a free fit calculator like ItemFits or book a pre-delivery assessment before the truck shows up.
TL;DR:
- Measure the actual clear opening of the doorway from jamb to jamb, not the door slab, to ensure accurate clearance for large items.
- Use the two-smallest-dimensions rule to determine if an object can tilt through the door, comparing these to the doorway’s diagonal measurement.
- Check full travel paths, including hallways and stair turns, for narrower choke points that could block the move more than the front door.
- Attempt practical fixes like removing the door, trim, legs, or hardware first, but avoid structural modifications that require professional help.
- Consider professional pre-delivery assessments to verify clearance margins under 2 inches and prevent costly failed moves.
Table of Contents
- How to Measure Oversized Item Doorway Clearance the Right Way
- How to Measure the Item and Apply the Tilt-Fit Math
- Check the Full Path, Not Just the Front Door
- Practical Ways to Gain Clearance Before You Give Up
- A Delivery-Day Checklist to Avoid a Failed Move
- Why Door Swing and Hinge Side Matter More Than People Think
- Door Frame Materials and What They Allow You to Modify
- Keeping Everyone and Everything Safe During the Move
- When a Measuring Tape Isn’t Enough
- Let Fix Move Haul Handle the Measuring and the Muscle
- Sources
How to Measure Oversized Item Doorway Clearance the Right Way
Most tape-measure mistakes happen because people measure the door slab, not the opening the couch actually has to pass through. Oversized item doorway clearance is the usable, jamb-to-jamb gap after trim, stop, and hinges eat into the number stamped on the door itself. That distinction is why a “36 inch” door rarely gives you 36 inches to work with.
There are two ways to check it, and you should know both.
Jamb-to-jamb measurement means running the tape from the inside face of one door jamb to the inside face of the other, at the narrowest point (usually right where the door stop molding sticks out). This gives you the true clear opening.
Open-door face method means measuring the width of the door slab itself while it’s swung open, then subtracting hinge and stop clearance. Use this when the door is already off its hinges or the frame is obscured by furniture.
Either method should land you close to the same figure, and that figure is almost always smaller than the nominal size printed on the packaging or the builder’s spec sheet.
Standard interior doors typically run 80 inches tall by 30 to 32 inches wide in clear opening, while exterior entry doors commonly measure 34 to 36 inches. The gap between the “nominal” size and the real clear opening usually comes out to 1.5 to 2 inches, lost to the door slab, hinge barrels, and stop molding.
A quick real-world example: a door sold and labeled as “36 inch” frequently clears about 34 to 35 inches once you account for trim. That’s the number that matters when you’re checking whether a couch through a narrow doorway is even possible, not the number on the box.
Here’s what to grab before you start measuring:
- A tape measure (steel, not fabric, for accuracy)
- A pencil and notepad, or your phone’s notes app
- A level, if the frame looks uneven or the house has settled
- A record of both jamb-to-jamb width and total height, plus diagonal if you can get it
Write down every number as you go. Pro Tip: Measure the narrowest point of the opening, not the widest. Door stops usually protrude more at the bottom than the top, so check both ends before settling on one number.
Homeowners researching narrow doorway couch problems almost always skip the trim allowance and end up with a number that’s off by two inches, which is exactly the margin that turns a workable delivery into a stuck one. Measure twice, and measure the actual gap the furniture has to pass through, not the door.
How to Measure the Item and Apply the Tilt-Fit Math
Once you know the doorway’s real clearance, the next job is measuring the item correctly, and most people get this part wrong too. You need three dimensions, taken at the widest points, including anything that sticks out.
- Width at the widest point, including arms, handles, or side rails
- Depth at the widest point, including cushions and any protruding feet
- Height at the tallest point, including legs and any hardware on top
Skip a doorknob or a sofa arm in your measurement and you’ll show up short on delivery day. Include protrusions every time.
The rule that actually decides whether something will fit is the two-smallest-dimensions rule: you don’t need the whole item to clear the doorway straight on, you need the two smallest of its three dimensions to clear it when tilted diagonally. That’s the logic behind fit calculators like ItemFits, which test both a straight-fit and a tilt-fit against the doorway’s diagonal measurement.
Here’s the math in plain terms. A standard 32 by 80 inch door has a diagonal of roughly 86 inches, calculated as the square root of (32² + 80²). If an item’s two smallest dimensions both fall under that 86 inch diagonal, and neither one alone exceeds the straight width or height, tilting it through the frame usually works even when pushing it straight through would not.

Three quick examples show how this plays out:
Sofa, straight-fit: A loveseat measuring 30 inches deep by 33 inches tall passes through a 34 inch wide, 80 inch tall doorway without any tilt needed. Margin: roughly 4 inches on width, comfortable.
Mattress, tilt-fit: A queen mattress at 60 by 80 inches won’t go through a 32 inch door straight, but tilted onto its edge and angled through, its cross-section (thickness by width, often 10 by 60 inches) can clear an 86 inch diagonal opening with room to spare.
Refrigerator, won’t fit: A French-door fridge at 36 inches wide, 70 inches tall, and 34 inches deep exceeds most standard 32 inch openings on every axis, and its bulk resists tilting because the depth and width are both too large. This is a door-removal or alternate-entry case, not a tilt-fit case.
For precision, measure to the nearest half inch, not the nearest inch. Fit-calculator guidance generally treats anything under 2 inches of margin as a tight fit that needs a retest after every adjustment, while 2 or more inches of clearance is considered comfortable. If you’re at 1 inch of margin or less, that’s not a “probably fine” situation, that’s a situation where you remove the door and measure again before committing.
Check the Full Path, Not Just the Front Door
The doorway is often not the tightest squeeze. Hallways, stairwell turns, and elevator cabs frequently constrain a move more than the entry itself, and the narrowest point along the entire route is the one that decides whether the item arrives intact.
Measure every choke point the same way you measured the front door: clear width at the narrowest spot, not the average.
- Hallway width, measured wall to wall at any point where furniture or fixtures narrow it
- Stair clear width between handrails, plus headroom above the stair run
- Landing depth, especially at switchback turns where a long item has to pivot
- Elevator cab interior dimensions and door opening width, if the building has one
Newel posts, wall-mounted railings, and low ceiling soffits above stairwells are the usual hidden culprits. A staircase that measures fine for width can still block a tall dresser if the ceiling drops to 78 inches at the landing turn. Measure headroom at the tightest point of any turn, not just at the bottom of the stairs.
Moving equipment changes your effective dimensions too. A dolly adds height, and furniture blankets or moving pads typically add an inch or more of padding around the item’s outer edge on every side. Account for that buffer before you declare a “just barely fits” situation as safe.
Pro Tip: If the path includes a 90 degree turn in a hallway, the effective clearance you need is often larger than the hallway’s straight width alone. A long item has to pivot through the corner, and that pivot radius is usually the real constraint, not the hallway itself.
When the interior path simply won’t work, alternate entries like a patio slider or a removed window sash can solve it, but that route brings its own risks. Hoisting furniture through a window or over a balcony rail can require rigging, and depending on your building, may involve permits, insurance coordination, or a professional rigging crew. For big single-piece moves like a piano headed upstairs, specialized moving guidance is worth reviewing before attempting a DIY hoist.
Practical Ways to Gain Clearance Before You Give Up
A near-fail on paper often becomes a clean pass once you strip away the parts of the doorway and the furniture that aren’t load-bearing. Work through these in order, from easiest to most involved, and retest after each one.
- Remove the door itself. Pulling the hinge pins and lifting the door slab off its frame typically gains about 1.5 to 2 inches of usable width, since you eliminate the slab thickness and the swing clearance it demands.
- Remove door trim or casing. Popping off the trim on one or both sides can add roughly 0.5 to 1 inch per side, useful when you’re just barely short.
- Unbolt legs and feet. Many sofas, tables, and cabinets have removable legs; taking them off can reduce overall height by 2 to 6 inches depending on the piece.
- Take off handles, knobs, and hardware. These protrusions rarely add much bulk but can be the exact inch that turns a tight fit into a stuck one.
- Compress or remove cushions. Loose sofa cushions add width and depth that don’t need to travel attached; pull them off and carry separately.
- Partial disassembly. Detachable headboards, table leaves, and sectional pieces should come apart before the move, not get forced through a doorway whole.
Fix Move Haul’s disassembly and reassembly services exist for exactly this stage of the process, where taking a piece apart correctly (and putting it back together without stripped screws) makes the difference between a clean delivery and a damaged one.
Pro Tip: Retest the fit after every single modification, not just at the end. Removing the door might get you to a 1 inch margin that’s still too tight, in which case unbolting the legs is your next move, not a nice-to-have.
Structural or electrical risk is where DIY should stop. If gaining clearance means removing a load-bearing header, cutting drywall, or disturbing wiring near the frame, that’s a job for a licensed contractor, not a Saturday afternoon project. A general rule of thumb: if the fix only involves parts designed to be removable (doors, trim, legs, cushions), it’s a reasonable DIY task. If it involves anything structural, call a professional.
A Delivery-Day Checklist to Avoid a Failed Move
Follow this sequence in order, and don’t skip steps just because the first measurement looked promising.
- Measure and record. Get the doorway’s clear opening and the item’s three dimensions, to the nearest half inch, written down or photographed for reference.
- Run the geometry check. Use the two-smallest-dimensions rule against the doorway diagonal, or plug the numbers into a free fit calculator, and note your margin in inches.
- Apply fixes if the margin is tight. Work through door removal, trim removal, leg removal, and cushion removal in that order, retesting the numbers after each change.
- Call a professional if the risk remains. If you’re still under 2 inches of margin after reasonable fixes, book a pre-delivery check or a same-day move service rather than gambling on delivery day.
That fourth step is the one people skip most often, usually because they’ve already spent an hour measuring and want to just try it. Resist that urge. A failed attempt at squeezing an oversized sofa through a doorway risks gouged walls, damaged furniture, and in some cases a return trip that costs more than the original delivery fee.
Document your measurements no matter which path you take. If a delivery does fail and you end up filing for a return, having your own measured notes protects you when a retailer’s oversized-item return policy puts the burden of proof on you.
Why Door Swing and Hinge Side Matter More Than People Think
A doorway’s swing direction changes how much usable space you actually have during the move, even though it doesn’t change the static clear opening measurement. A door that swings into the room you’re moving furniture out of can block part of your maneuvering space right when you need it most, especially in a tight hallway or a small bedroom.
Hinge side matters for a different reason: it determines which direction you can angle a long item as it clears the frame. If the hinges are on the left, tilting a sofa toward the right as it exits usually gives more working room than fighting the door swing on the hinge side.
Removing the door solves both problems at once, which is part of why it’s the first fix on most movers’ lists. Once the slab is off, swing direction becomes irrelevant and hinge side no longer restricts your tilt angle.
If you can’t remove the door (a fire-rated door in a multi-unit building, for instance), prop it fully open and secured before you start, and plan your tilt angle around the hinge side rather than against it. A doorstop or a helper holding the door open beats letting it swing back mid-move.
Door Frame Materials and What They Allow You to Modify
Not every door frame tolerates the same fixes, and the material matters more than most people realize before they start unscrewing hardware.
Standard wood-framed interior doors are the easiest case. Trim comes off with a pry bar and patience, hinge pins pull with a simple punch, and putting everything back afterward is usually a straightforward repair.
Steel frames, common on exterior entry doors and some fire-rated interior doors, are a different story. The frame itself is often welded or bolted into the surrounding structure, and removing trim may expose fasteners you shouldn’t disturb without knowing what’s behind them. Fire-rated doors in condos and multi-family buildings frequently can’t be modified at all without violating code, since the frame and door work together as a rated assembly.
Composite and vinyl-clad frames, common in newer construction, tend to be more brittle than solid wood at the fastening points. Aggressive trim removal can crack the cladding, so a gentler approach (loosening screws rather than prying) usually works better.
If you’re uncertain what’s behind a doorframe or whether it’s structural, that uncertainty alone is a good reason to have someone experienced take a look before you start removing parts. A frame that looks like ordinary trim can occasionally be tied into load-bearing elements, particularly in older homes that have had additions or renovations.
Keeping Everyone and Everything Safe During the Move
The measurements matter, but so does the physical act of getting a heavy, awkward object through a tight space without hurting a person or the house.
Two or more people should handle anything over roughly 50 pounds, and the person guiding the leading edge through the doorway should never have their hand between the item and the frame, where a shift in weight can pin fingers against the jamb. Furniture blankets and corner guards protect both the item and the walls, and they’re worth the few extra minutes it takes to wrap a piece properly before the tight squeeze.
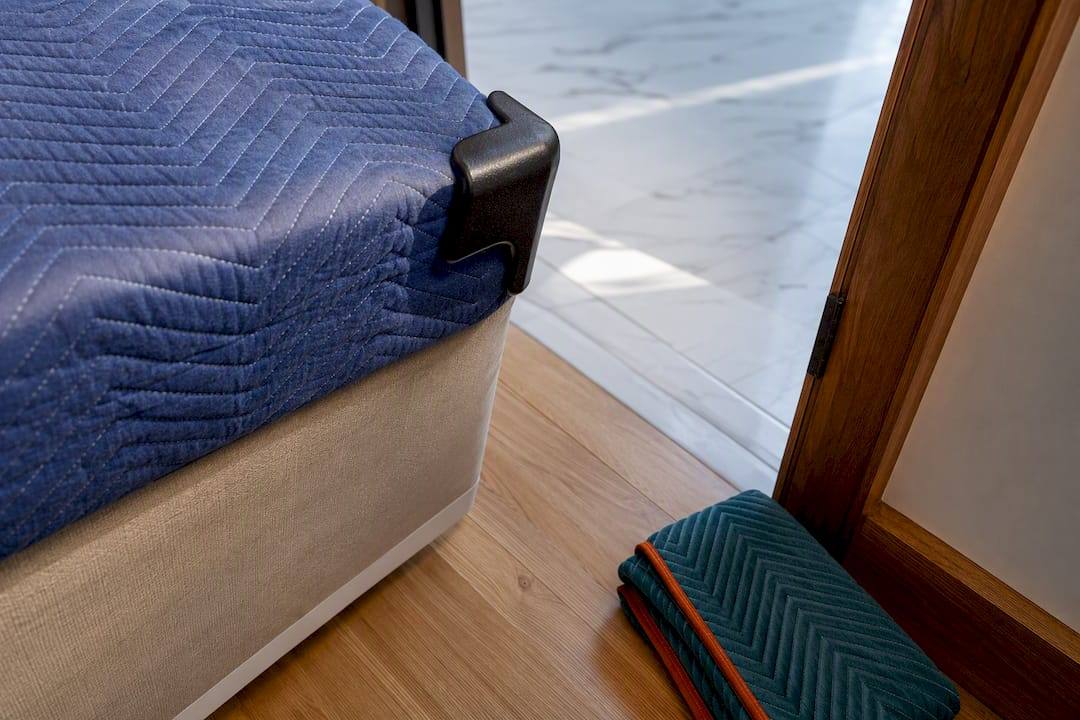
Clear the path completely before you start moving, not while you’re mid-carry. Rugs, cords, and pets are the three most common causes of a dropped item during a doorway maneuver, and all three are avoidable with thirty seconds of prep.
Communicate verbally through the whole pass, especially on tilt-fit moves where the person on one end can’t see the doorway clearance the other person is watching. A simple “stop, hold, tilt left” beats guessing.
If you feel the item catch or bind at any point, stop and reassess rather than forcing it. Forcing a stuck item is how door frames get gouged and how backs get hurt. For heavier single items, safe lifting fundamentals are worth reviewing before moving day, particularly around lifting technique and knowing when a piece is simply too heavy for a two-person carry.
When a Measuring Tape Isn’t Enough
Homeowners tend to trust their own tape measure right up until the sofa is jammed sideways in the hallway. That’s not a failure of effort, it’s a failure of the margin for error. A doorway measured at home, on a ladder, with a slightly bent tape, carries more uncertainty than most people account for, and the geometry math only works if the inputs are accurate.
Where I think the conventional advice falls short is in treating the tilt-fit calculation as the final word. It’s the right math, but it assumes a clean, obstruction-free pivot, which real hallways and staircases rarely offer. A calculator will tell you the doorway diagonal clears your item by an inch and a half. It won’t tell you that the hallway makes a 90 degree turn eight feet later with a light fixture hanging eighteen inches too low.
Professional pre-checks earn their cost in the situations that matter most: very tight clearances under 2 inches, heavy single-piece items like pianos or gun safes that can’t be muscled back out if they get stuck, and staircases with landing turns that don’t show up clearly in a quick measurement. In those cases, Fix Move Haul’s pre-delivery surveys, door removal, and disassembly and reassembly work exist specifically to catch the constraint a homeowner’s tape measure misses, and same-day pickup and delivery means a failed attempt doesn’t turn into a week of rescheduling.
If you do hire someone for a pre-check, ask for photos of the measured points and written notes on the clearance margin, not just a verbal “should be fine.” That documentation is what protects you if a return dispute comes up later.
— Mark
Let Fix Move Haul Handle the Measuring and the Muscle
Fix Move Haul is the practical alternative to guessing with a tape measure and hoping for the best. Instead of researching diagonal math on your own and risking a stuck sofa in a Naples hallway, you get a team that measures the doorway, the path, and the item, then does the door removal or disassembly work on the spot if needed.

Here’s what’s included when you book an oversized-item move:
- Pre-delivery measurement checks on the doorway, hallway, and any stair or landing turns
- Door removal and reassembly when a straight or tilt-fit isn’t going to work
- Furniture disassembly and reassembly for sectionals, beds, and large case goods
- Same-day pickup, delivery, and installation across Southwest Florida
If you’re already facing a return because a delivery failed, Fix Move Haul’s return and exchange service can pick up the item and handle the exchange, which often costs less than the restocking fee some retailers charge for unresolved oversized returns. For a move that’s still ahead of you, start with the furniture delivery page and request a pre-check before delivery day. It’s a fifteen minute call that can save you an afternoon of a couch stuck sideways in your own front door.
Sources
Before delivery day, run your numbers through ItemFits’ doorway calculator, which applies the same straight-fit and tilt-fit math movers use and tells you exactly what’s blocking the move if it fails. For background on how manufacturers define oversized interior doors and clear opening standards, One Day Doors & Closets breaks down nominal versus usable sizing in more depth. If accessibility code minimums matter for your situation, the ADA’s 2010 design standards define the baseline clearances public and multifamily spaces must meet. And before you buy anything oversized, check the retailer’s return policy for oversized items so you know the cost of a failed delivery upfront.
- What is standard interior door size | DoorsForPros
- Will It Fit Through the Door? Free Doorway Calculator | ItemFits
- Oversized item return policy | Bed Bath & Beyond Help