How to Move a Treadmill Safely: Step-by-Step Guide
How to Move a Treadmill Safely: Step-by-Step Guide
Yes, you can move most home treadmills yourself — but only if the conditions are right. Most residential treadmills weigh a few hundred pounds, and units in this typical range are manageable with two strong helpers, an appliance dolly, and a clear route. Add stairs, a tight hallway, or a commercial unit pushing 350+ lbs, and the math changes fast.
Here is what to do first:
- Measure everything: doorways, hallways, stair landings, and the truck opening before you touch the machine
- Unplug the treadmill and remove the safety key
- Get an appliance dolly rated for at least 300 lbs and recruit a second person (a third for stairs)
- If the treadmill exceeds 250 lbs, involves stairs, or you have any physical limitations, call Fixmovehaul instead of risking it
OSHA’s manual handling guidance draws a clear line: team lifts, proper footwear, and a clear path are non-negotiable for loads over 50 lbs per person. A 250-lb treadmill split between two people is already at that ceiling.
Table of Contents
- What should you measure before moving a treadmill?
- Tools and equipment you need for a safe move
- When and how to partially disassemble a treadmill
- How to move a treadmill across a flat surface
- What should you do when stairs are unavoidable?
- How to load a treadmill into a truck or van
- How to reassemble and test a treadmill after the move
- Lifting technique and how to avoid common injuries
- When should you hire professional movers for a treadmill?
- Why you should never lay a treadmill on its side
- Key Takeaways
- The part most people underestimate about moving a treadmill
- Fixmovehaul makes heavy moves easier in Southwest Florida
- Useful sources and further reading
What should you measure before moving a treadmill?
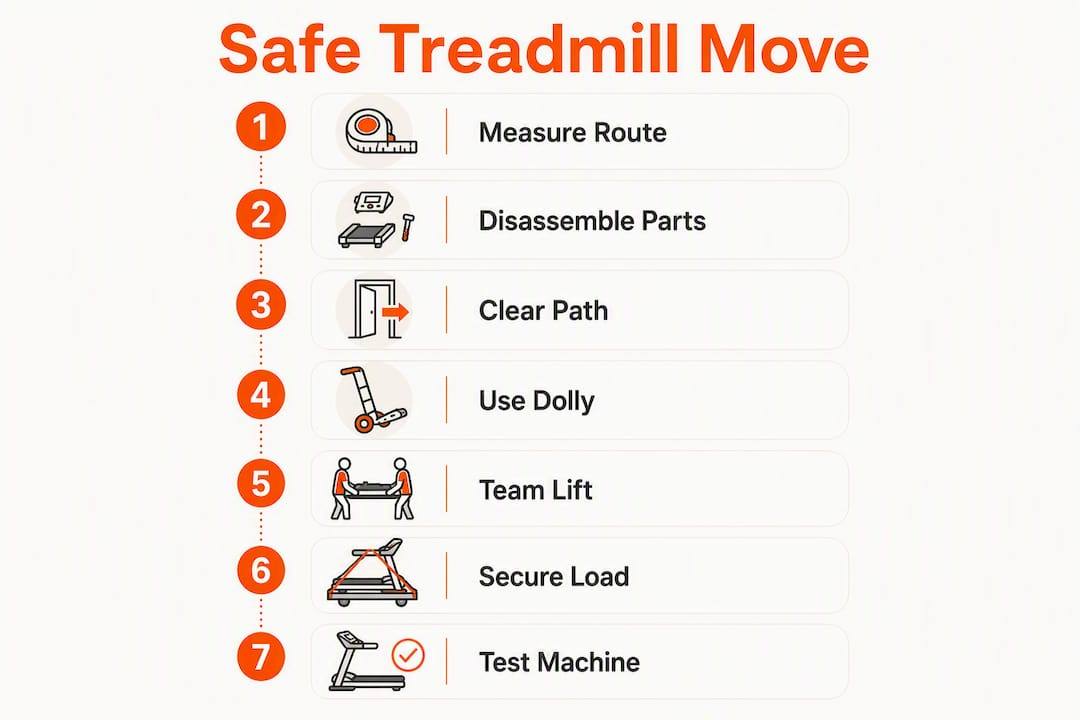
Planning prevents the worst move-day scenario: getting a 280-lb machine halfway through a doorway and realizing it won’t fit. Folded treadmill widths commonly fall between roughly 28 and 36 inches. Measure the folded dimensions and check every doorway, hallway, and stair landing before moving day. If any doorway is under 36 inches, check whether the door can be removed from its hinges. Removing a door adds roughly 1.5–2 inches of clearance, which is often enough. A good resource on the practical risks of that process is this guide on DIY door challenges from One Day Doors & Closets.
Power safety steps:
- Unplug the power cord from the wall, not just the machine.
- Remove the safety key and bag it separately so it doesn’t get lost.
- Wrap the power cord and secure all accessories with zip ties or heavy-duty tape.
- Photograph the console wiring and any bolt locations before disconnecting anything.
Pro Tip: Take photos of the console wiring from multiple angles before you touch a single cable. Reassembly goes twice as fast when you have a reference.
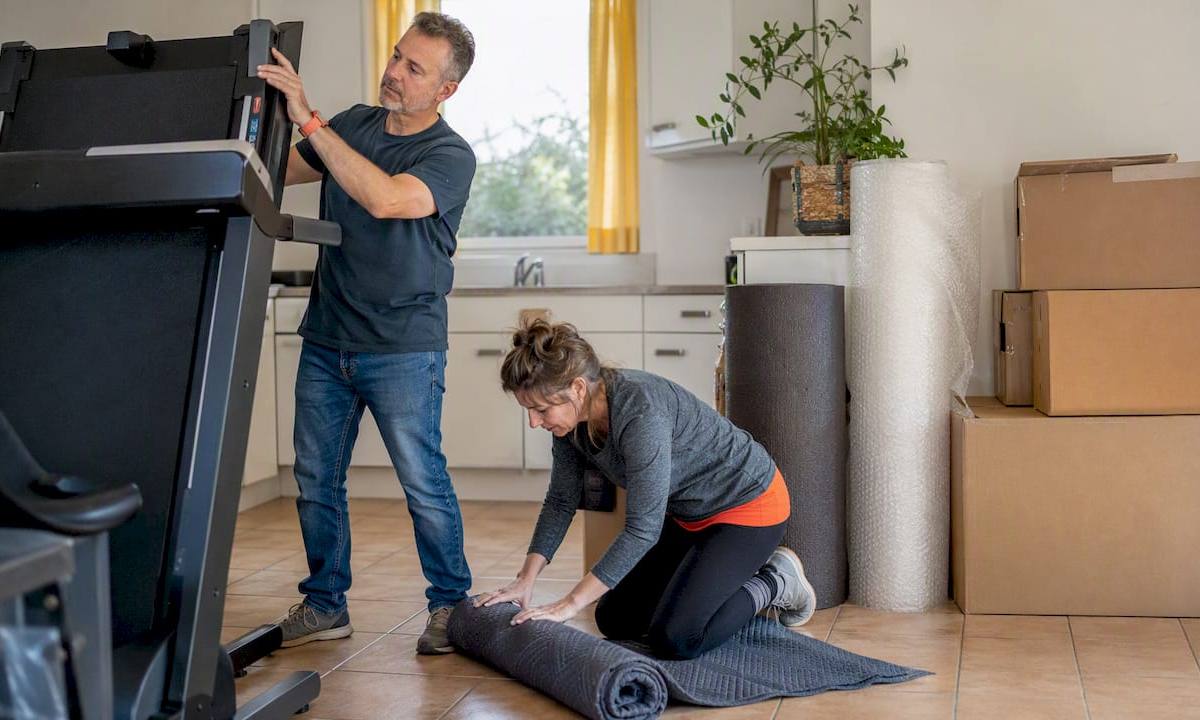
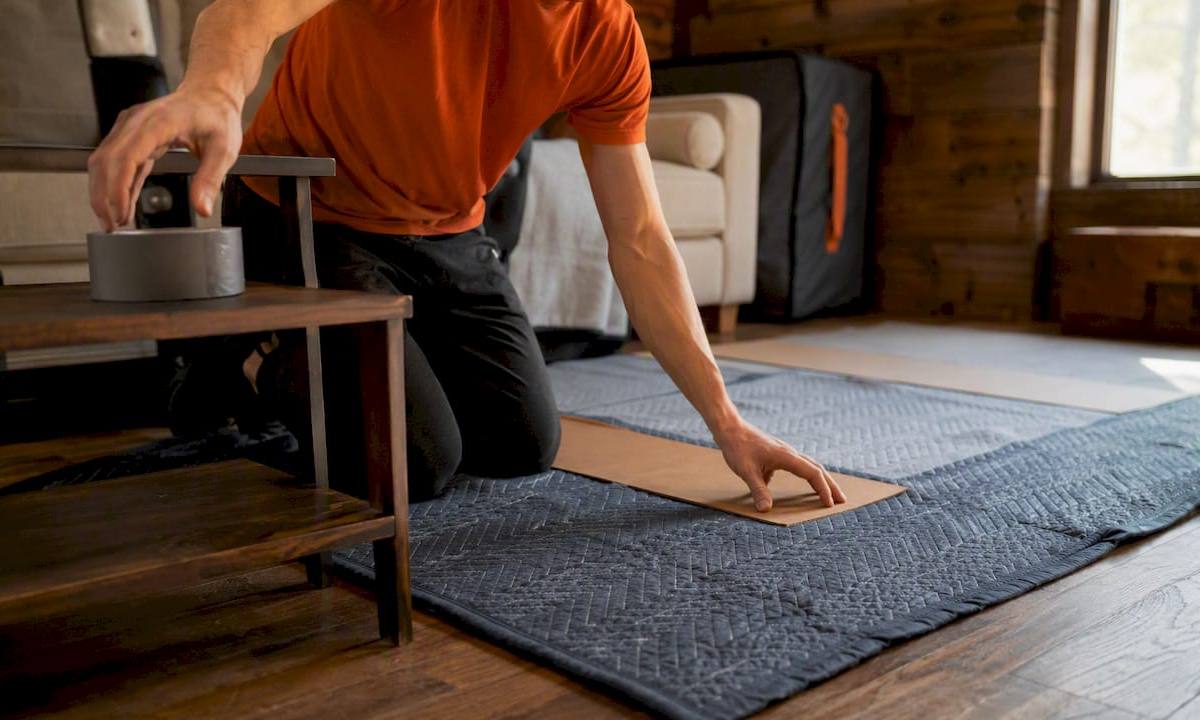
Clear the entire route before the lift: remove rugs (they catch dolly wheels), prop doors open, lay down cardboard or floor runners to protect hardwood, and pad wall corners with moving blankets.
Tools and equipment you need for a safe move
Getting the gear right before you start is the difference between a smooth two-hour job and a damaged machine or a pulled back.
Must-have equipment:
- Appliance dolly rated for at least 300 lbs (the hand-truck style with a strap, not a furniture dolly)
- Moving straps or ratchet straps to secure the folded deck to the base during transport
- Moving blankets to wrap the console and protect painted surfaces
- Heavy-duty tape and zip ties for cords and loose parts
- Work gloves with grip palms
- Closed-toe shoes with ankle support (sneakers are not enough for a 250-lb load)
Useful but optional:
- Stair-climbing dolly if stairs are unavoidable
- Moving harnesses (shoulder straps) to distribute weight across your body
- Furniture sliders for repositioning on hardwood without lifting
- Loading ramp for truck entry without a liftgate
The stair-climbing dolly becomes essential as soon as stairs are involved in the move. Standard hand-truck dollies have no mechanism for controlled stair descent, and improvising that control with a heavy machine is where injuries happen.
When and how to partially disassemble a treadmill
Not every treadmill needs to come apart, but partial disassembly can reduce the effective width by 6–10 inches and drop the height enough to clear a low doorframe. The key word is partial.
Check your owner’s manual first. Most residential treadmills allow removal of the console mast, uprights/handrails, and side rails. What you should never touch without professional guidance: motor mounts, drive belt components, or any wiring that runs through the upright tubes.
Safe disassembly workflow:
- Photograph the assembled machine from all four sides.
- Remove the console (usually two to four bolts at the top of the uprights).
- Bag every fastener in a labeled zip-lock bag: “console bolts,” “left upright,” etc.
- Lay removed parts flat in the truck, wrapped in moving blankets.
Pro Tip: Never remove a part you can’t confidently reinstall. If the manual doesn’t describe the step, stop. Exposed wiring and motor mounts are a hard stop — that’s when you call a pro.
If disassembly requires accessing the motor housing or cutting any cable tie that runs through the frame, that is a red flag. Stop and hire someone with the right tools and experience. The professional disassembly approach used by trained crews is worth understanding before you decide how far to go yourself.
How to move a treadmill across a flat surface
This is the core technique for single-level moves. Follow the steps in order; skipping ahead is how consoles get cracked and floors get gouged.
- Fold and lock the deck if the treadmill has a folding mechanism. Engage the latch fully.
- Add a secondary restraint. Integrated folding latches are designed for storage, not transport. Loop a ratchet strap around the folded deck and base before moving. This is not optional.
- Position the dolly at the rear of the machine (the heavier, motor end). Tilt the treadmill back toward you and slide the dolly plate under the base.
- Tilt to roughly 45 degrees. This angle gives the best balance and control through doorways and around corners. Too upright and the machine wants to tip forward; too flat and you lose steering.
- Secure with straps before rolling anywhere.
- Roll slowly, with one person guiding from the front and one steadying from behind. Call out every threshold, rug edge, and corner.
- At doorways, angle the machine diagonally if needed. Never force it straight through a tight frame.
Pro Tip: Never grab the console housing or plastic side covers as handholds. They are not structural. Use the metal frame or the dolly handles.
Protect floors by laying cardboard runners or moving blankets along the entire path before you start rolling. Treadmill bases have sharp metal edges that will scratch hardwood on contact.
What should you do when stairs are unavoidable?
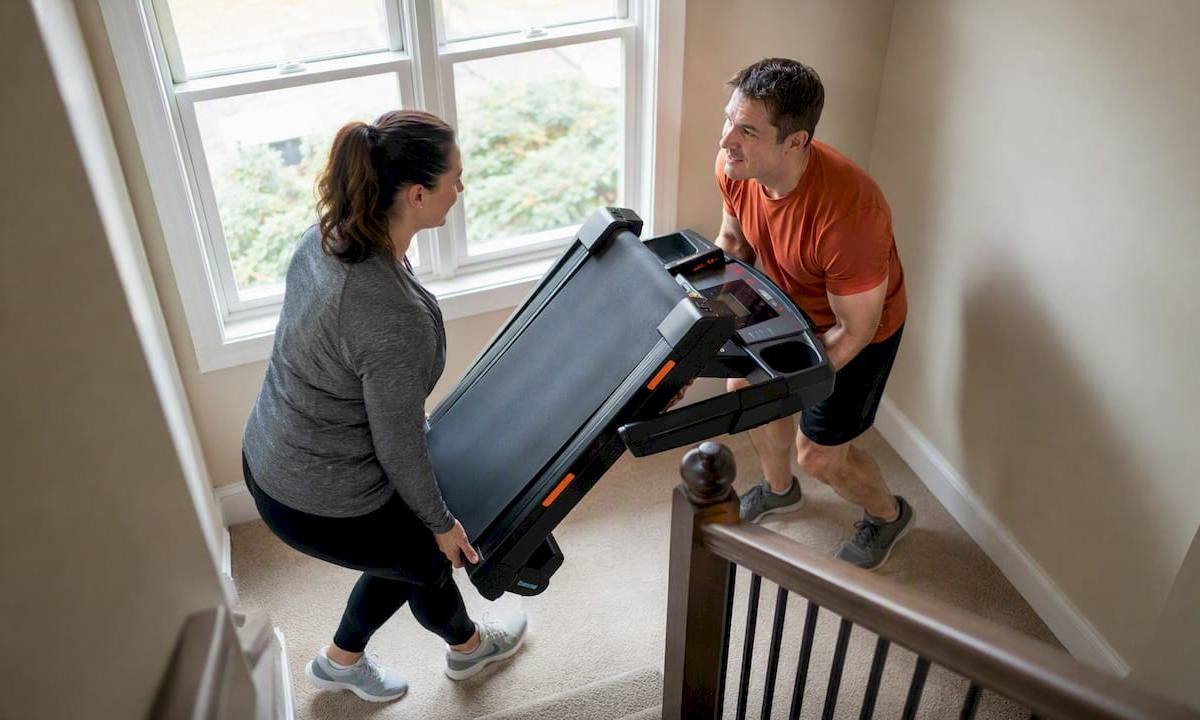
Stairs are where DIY treadmill moves go wrong. The weight distribution is uneven (the motor end is heavier), momentum builds fast on a descent, and most stair landings are too small to safely reposition a 200-lb machine.
Moving a heavy treadmill down stairs with only two people and a standard hand-truck dolly is one of the most common causes of serious moving injuries. The machine’s front-heavy motor housing shifts the center of gravity forward, making controlled descent nearly impossible without a stair-climbing dolly or a third person acting as a dedicated brake.
When a DIY stair move is acceptable:
- The treadmill is a light, foldable residential model (under 150 lbs)
- You have at least three people: one at the top guiding, one at the bottom controlling descent, one as a spotter on the landing
- You have a stair-climbing dolly with stair-gripping wheels
When to hire professionals instead:
- The unit weighs a heavy amount exceeding common manual lift capabilities.
- There are multiple flights or tight landings
- Any mover has a back, knee, or shoulder limitation
For the controlled step technique: keep the machine tilted toward the upper person, move one stair at a time, and call out each step before moving, ensuring careful communication. The bottom person controls the pace; the top person guides direction. Never let the machine lead.
Do not lay the treadmill on its side to navigate a landing. That causes internal damage covered in detail below.
How to load a treadmill into a truck or van
Loading is the second-highest injury point after stairs. A ramp makes this manageable; no ramp makes it genuinely dangerous.
Before loading:
- Lay moving blankets on the truck floor where the treadmill will sit
- Position the treadmill against the front wall of the cargo area (farthest from the doors) to reduce shifting during transit
- Confirm the ramp angle is shallow enough to roll the dolly without losing control
Loading steps:
- Two people: one pushing from behind, one guiding from inside the truck
- Roll the dolly up the ramp slowly, keeping the treadmill at the same 45-degree angle used on flat ground
- Once inside, set the machine upright against the front wall
- Wrap the console and incline mechanism in moving blankets before strapping
Securing the load:
- Use at least four ratchet straps: two across the base, two across the upper frame
- Cross the straps in an X pattern to prevent tipping in either direction
- Protect the console from strap pressure with a folded blanket between the strap and the housing
- Check strap tension after driving the first quarter mile; loads settle
Pro Tip: Never rely on a single strap across the middle. A treadmill that tips during a hard brake can punch through a van wall or crush anything stored next to it.
How to reassemble and test a treadmill after the move
Reassembly goes in reverse order from disassembly: structural frame first, uprights next, console wiring last. Use the photos you took before the move.
Reattach every fastener to its labeled bag’s location. Do not substitute bolts or skip any. Treadmill uprights carry vibration loads during use, and a loose bolt that felt “good enough” will work itself free within a few sessions.
Post-move testing checklist:
- Plug in and insert the safety key
- Start at the slowest speed and watch for grinding noises, belt drift, or error codes
- Test the emergency stop
- Run the incline through its full range while standing beside the machine, not on it
- Check belt tracking: it should stay centered; drift toward one side means the rear roller needs adjustment
Stop immediately if you hear motor grinding, see the belt shift off-center, or get an error code that wasn’t there before the move. Those are signs of internal damage that a technician needs to assess before you use the machine again.
Storage guidance: If the treadmill won’t be reassembled right away, keep it folded upright in a climate-controlled space. Humidity is the enemy of the motor and electronics. Avoid garages in Southwest Florida during summer months unless the space is air-conditioned.
Before moving any treadmill, check the manufacturer’s warranty terms. Some warranties include clauses that void coverage if the machine is moved by anyone other than an authorized technician.
Lifting technique and how to avoid common injuries
The geometry of a treadmill makes it awkward in a specific way: the motor and front housing are heavier than the rear, so the machine wants to rotate forward when lifted. Plan every lift with that in mind.
Safe lifting principles:
- Squat down, keep your back straight, and drive up with your legs
- Keep the load as close to your body as possible
- Never twist at the waist while holding weight; pivot your feet instead
- Communicate every move out loud: “lifting,” “stepping right,” “setting down”
- Use a spotter whenever the path has any obstacle
- Rotate roles if the move takes more than 20–30 minutes; grip and leg fatigue are real injury risks
Common injury scenarios:
- Pinch points at the base when setting the machine down; keep fingers on the frame, not underneath
- Dropped deck when the folding latch releases unexpectedly; always use a secondary strap
- Threshold stumble when rolling the dolly over a door threshold; slow down and call it out
Wear gloves with grip palms, closed-toe shoes, and consider a knee brace if you have any existing joint issues. OSHA’s ergonomics guidelines recommend team lifts for loads that exceed one person’s safe capacity, which a 200-lb treadmill almost always does.
When should you hire professional movers for a treadmill?
Some moves are DIY-appropriate. Others are not, and the cost of getting that wrong is higher than the cost of hiring help.
| Scenario | DIY or hire? | Typical cost range |
|---|---|---|
| Single-level, foldable treadmill, two helpers | DIY feasible | Dolly rental: $30/day |
| Single-level, heavy unit (250+ lbs) | Hire recommended | — |
| Stairs involved, any weight | Hire strongly recommended | — |
| Commercial unit (350+ lbs) | Hire only | Quote-based |
Professional movers bring stair-climbing dollies, experienced crews, and reduce the chance of repair bills or injuries that can exceed DIY savings. That last point matters more than most people expect: a single repair call for a damaged motor or cracked console can run $200–$500, which wipes out any savings from skipping professional help.
If the treadmill no longer works and you need to get rid of it rather than move it, responsible disposal typically combines e-waste handling for the electronics and scrap metal recycling for the frame. If it still runs, resale or donation is worth trying before calling for junk removal in Southwest Florida.
Fixmovehaul handles all of these scenarios in Naples, Bonita Springs, Lee County, Collier County, Estero, and across Southwest Florida. Same-day availability, transparent pricing, and a crew that arrives with the right equipment.
Why you should never lay a treadmill on its side
This comes up constantly, and the answer is consistent across every manufacturer and repair technician.
Laying a treadmill on its side during transport allows the motor mounts, belt-tension components, and internal wiring to shift under the machine’s own weight. The result is misalignment that may not show up until the first run — and by then, the damage is done.
Internal components including motor mounts, belt-tension systems, and wiring can shift or disconnect when a treadmill is laid on its side, causing misalignment and permanent damage. This is not a precaution for fragile machines only. It applies to every residential treadmill regardless of brand or price point.
The only exception: if your manufacturer’s documentation explicitly states a permitted transport orientation other than upright. Check the manual before assuming any alternative position is safe. When in doubt, keep it vertical.
Key Takeaways
Moving a treadmill safely requires measuring the route first, using an appliance dolly with a secondary strap, recruiting at least two helpers, and testing the machine at slow speed before full use.
| Point | Details |
|---|---|
| Measure before you lift | Check every doorway, hallway, and stair landing against folded treadmill dimensions (commonly 28–36 inches wide). |
| Unplug and secure | Remove the safety key, wrap the cord, and bag all fasteners before moving anything. |
| Use a dolly at 45 degrees | Tilt the machine to roughly 45 degrees for best control through doorways and around corners. |
| Never lay it on its side | Motor mounts, belt tension, and wiring can shift and cause permanent damage during transport. |
| Fixmovehaul for high-risk moves | For treadmills over 250 lbs, stairs, or commercial units in Southwest Florida, Fixmovehaul provides on-demand moving help with the right equipment. |
The part most people underestimate about moving a treadmill
The front-heavy motor housing is what catches people off guard. You can read every guide online, get a good dolly, and recruit two helpers — and still end up in trouble because nobody accounted for the fact that the machine wants to rotate forward the moment it leaves the ground.
Most DIY move failures happen not from lack of effort but from underestimating that weight distribution. The motor end feels manageable until you’re halfway through a doorway and the machine starts pulling the dolly out from under you. That’s the moment people grab the console for support, which is exactly the wrong move.
The practical rule I’d give anyone: if you have any doubt about the route, add one more helper before you start. Not after the first close call. Before. And use a ratchet strap on the folded deck even if the latch feels solid. Integrated latches are built for storage loads, not transport loads. The strap costs nothing and takes 30 seconds.
For stairs, the calculus is even simpler. A stair-climbing dolly and three people is the minimum for heavy treadmills. If you don’t have both, you don’t have a safe stair move. Hire it out. The cost of a professional crew is a fraction of what a back injury or a cracked console will run you.
Fixmovehaul makes heavy moves easier in Southwest Florida
Treadmills over 250 lbs, tight stairwells, and same-day moves are exactly the scenarios where Fixmovehaul earns its keep. The crew arrives with appliance dollies, moving straps, and stair-climbing equipment — no scrambling to rent gear or recruit neighbors.

Fixmovehaul serves Naples, Bonita Springs, Lee County, Collier County, Estero, and the broader Southwest Florida area with on-demand moving help, junk removal, furniture delivery, and single-item moves. If the treadmill is broken and needs to go, that’s covered too. Pricing is transparent and quoted upfront, and same-day availability is common for local jobs.
For a single heavy item that doesn’t justify a full moving company, the shopping and pickup service is worth a look. Ready to book or get a quote? Visit fixmovehaul.com to get started.
Useful sources and further reading
The technical and safety claims in this article draw from the following sources:
- Fix. Move. Haul. official site — on-demand moving and junk removal services in Southwest Florida