Outdoor TV Installation: DIY Checklist + Hire a Pro
Outdoor TV Installation: DIY Checklist + Hire a Pro
You can safely install a TV outdoors two ways: buy a purpose-built outdoor TV rated for your exposure level, or place a regular indoor TV inside a weatherproof enclosure. DIY works well when you already have a GFCI-protected outlet nearby and basic carpentry skills. Hire a pro when the job involves new wiring, a heavy enclosure, exposed full-sun mounting, or a permit.
Two clear paths:
- DIY route: Choose an outdoor-rated TV (IP55 minimum for covered areas, IP65+ for open exposure), mount it to studs or masonry using stainless steel hardware, connect to a dedicated GFCI outlet, seal every penetration with silicone, and verify the mount’s load rating covers the combined weight of TV plus any enclosure.
- Hire Fixmovehaul: New dedicated circuit needed, enclosure weighs 80+ lbs, the install is fully exposed to sun and wind, local permits are required, or you simply want it done right the first time without the weekend project.
Key Takeaways
A safe outdoor TV installation requires the right screen rating, a GFCI-protected circuit, outdoor-rated hardware, sealed penetrations, and a mount sized for the combined weight of the TV and any enclosure.
| Point | Details |
|---|---|
| Match screen to exposure | Use 1,000+ nits and IP55 minimum for covered areas; 1,500+ nits and IP65 for direct sun. |
| GFCI circuit is required | A dedicated GFCI-protected outlet with weatherproof cover is the only compliant power solution. |
| Check combined weight | TV plus enclosure can be heavy; verify mount capacity before ordering hardware. |
| Seal every penetration | Apply exterior silicone around every bolt and cable entry immediately after installation. |
| Fixmovehaul for local installs | Fixmovehaul serves Naples, Bonita Springs, Lee County, and Estero with same-day outdoor TV mounting. |
Table of Contents
- What screen do you actually need for outdoor use?
- Outdoor TV vs. weatherproof enclosure: which one fits your situation?
- Where should you mount the TV for the best viewing experience?
- How do you pick the right mount and hardware?
- What electrical work does an outdoor TV installation require?
- Step-by-step mounting checklist for a DIY outdoor install
- Which accessories make an outdoor entertainment system worth it?
- How do you maintain and winterize an outdoor TV?
- What does outdoor TV installation actually cost?
- When should you hire a professional instead of doing it yourself?
- How do you protect an outdoor TV from theft or vandalism?
- Do you need permits for an outdoor TV installation?
- Grounding and lightning protection for outdoor TVs
- How do you arrange seating for the best outdoor viewing angles?
- What most DIY outdoor installs get wrong
- Fixmovehaul handles outdoor TV installation across Southwest Florida
- Sources
What screen do you actually need for outdoor use?
Not every TV survives outdoors, and the gap between a living room display and a proper outdoor-rated panel is bigger than most people expect. The key variables are sun exposure, brightness output in nits, and IP (Ingress Protection) rating.
Three exposure classes drive the decision:
Outdoor brightness and IP guidance confirms that even shaded patios require 1,000+ nits because ambient outdoor light crushes contrast on a standard 250–400 nit indoor panel. Direct sun locations push that requirement to 1,500 nits or higher. For rain-exposed installs, IP65 is the practical floor; IP54 covers splash resistance for well-covered areas only.
Brands like SunBrite build specifically for these conditions, with anti-reflective glass, sealed electronics, and operating temperature ranges that handle Florida heat and humidity. If you go the enclosure route instead, the indoor TV inside still needs to be a model with adequate brightness, as the enclosure itself does not enhance screen brightness.
Pro Tip: QLED panels with anti-reflective coatings outperform standard LCD in outdoor conditions because they maintain color accuracy at high brightness levels. If you’re choosing between two outdoor TVs at similar price points, the one with an anti-reflective coating will look noticeably better at noon.
Outdoor TV vs. weatherproof enclosure: which one fits your situation?
The choice comes down to budget, how permanent the install is, and how much direct sun the location gets.
Dedicated outdoor TVs (SunBrite and similar) are purpose-built with sealed components, internal heaters and fans, and anti-reflective glass. They handle full-sun exposure, operate in high humidity, and typically carry longer weatherproof warranties. The trade-off is cost: quality outdoor panels start well above what you’d pay for a comparable indoor set.
Weatherproof enclosures let you use an indoor TV you may already own or a budget flat-screen. A good enclosure kit seals the TV behind tempered glass, includes ventilation, and mounts to a standard outdoor-rated bracket. This Old House’s enclosure guide walks through the process: mount the enclosure first, feed outdoor-rated power through a sealed grommet, and bolt everything to a bracket rated for the combined weight of TV plus enclosure. That combined weight matters more than most people realize. A 55-inch TV plus a steel enclosure can be quite heavy, so the mount capacity and wall structure both need to be verified before you lift anything.
Key trade-offs at a glance:
- Weatherproofing: Outdoor TVs are factory-sealed; enclosures depend on installation quality and seal maintenance.
- Operating temperature: Purpose-built outdoor TVs handle wider ranges; enclosures with active ventilation manage heat reasonably well but add complexity.
- Picture quality in sunlight: High-nit outdoor TVs win in direct sun; enclosure glass can add glare unless anti-reflective.
- Cost: Enclosure plus a budget indoor TV is typically the lower-cost entry point; dedicated outdoor TVs and commercial-grade panels are significantly more expensive.
- Longevity: Outdoor TVs generally last longer in harsh conditions; enclosures extend indoor TV life but aren’t equivalent to a purpose-built unit.
For a covered Southwest Florida lanai with partial shade, an enclosure is a practical and cost-effective choice. For a pool deck with no overhead cover, a purpose-built outdoor TV is the better long-term investment.
Where should you mount the TV for the best viewing experience?
Location affects everything: glare, viewing comfort, structural safety, and how long the TV lasts. Get this wrong and no amount of hardware fixes it.
Viewing distance and screen size scale together outdoors. Outdoor seating tends to spread out more than indoor arrangements, often 12–20 feet from the screen. At 15 feet, a 65-inch screen is a reasonable minimum; at 20 feet, 75 inches or larger makes sense. Mount height should place the center of the screen at or slightly above seated eye level, roughly 42–48 inches from the floor to screen center for standard patio furniture.
Glare is the number-one hidden challenge in outdoor setups. Even a fully shaded patio has dramatically higher ambient light than any indoor room, which is why professionals consistently emphasize high-nit screens and anti-reflective treatments for daytime viewing. Orient the screen away from the primary sun angle. A south-facing wall in Florida means the screen faces north, which is ideal. East or west-facing screens catch morning or afternoon sun directly and need either a deep overhang or a sun shade to be usable during those hours. Pairing your setup with thoughtful outdoor lighting for evening viewing also reduces eye strain and improves perceived contrast after dark.
Structural surface requirements are non-negotiable. The mount must land in studs, masonry, or a purpose-built reinforced post. Avoid mounting above a grill or outdoor fireplace; heat rises and sustained high temperatures degrade electronics faster than weather does. High-wind locations, common in Southwest Florida during storm season, require wind-rated mounting strategies and may need additional backing installed inside the wall cavity.
How do you pick the right mount and hardware?
The mount is the one component where cutting corners has immediate consequences. A TV that falls off a wall is a safety hazard, not just a replacement cost.
Mount types by location:
- Fixed mount: Best for covered walls where the viewing angle never changes. Lowest profile, highest stability.
- Tilting mount: Adds 5–15 degrees of vertical adjustment, useful when mounting height is above ideal eye level.
- Full-motion/swivel: Useful for corner installs or spaces where seating moves, but adds mechanical complexity and potential failure points outdoors.
- Ceiling mount: Good for covered patios with high ceilings; requires structural verification of the ceiling joist or beam.
- Flip-down/pop-up enclosure: Conceals the TV when not in use; excellent for aesthetics but adds significant weight and cost.
This Old House’s outdoor TV installation guide specifies outdoor-rated mounts with stainless-steel hardware throughout, locating every fastener into studs or masonry. Standard zinc or uncoated steel bolts rust within one Florida rainy season. Use stainless steel or hot-dip galvanized lag bolts, anchors, and screws for every penetration.
Weight calculation: Add the TV weight plus enclosure weight (if applicable) and multiply by 1.5 as a safety margin. Check the mount’s VESA compatibility and its stated load rating in the product manual. A 55-inch TV at 45 lbs inside a 60-lb enclosure equals 105 lbs combined; your mount needs a rated capacity above that figure, not just equal to it.
Pro Tip: Before drilling, use a stud finder and a small probe bit to confirm stud location and depth. Exterior walls sometimes have blocking, insulation, or sheathing that affects anchor depth. Knowing what’s behind the surface before you commit to a mount position saves a lot of patching.
What electrical work does an outdoor TV installation require?
This is where most DIY installs go wrong, and where the safety stakes are highest.
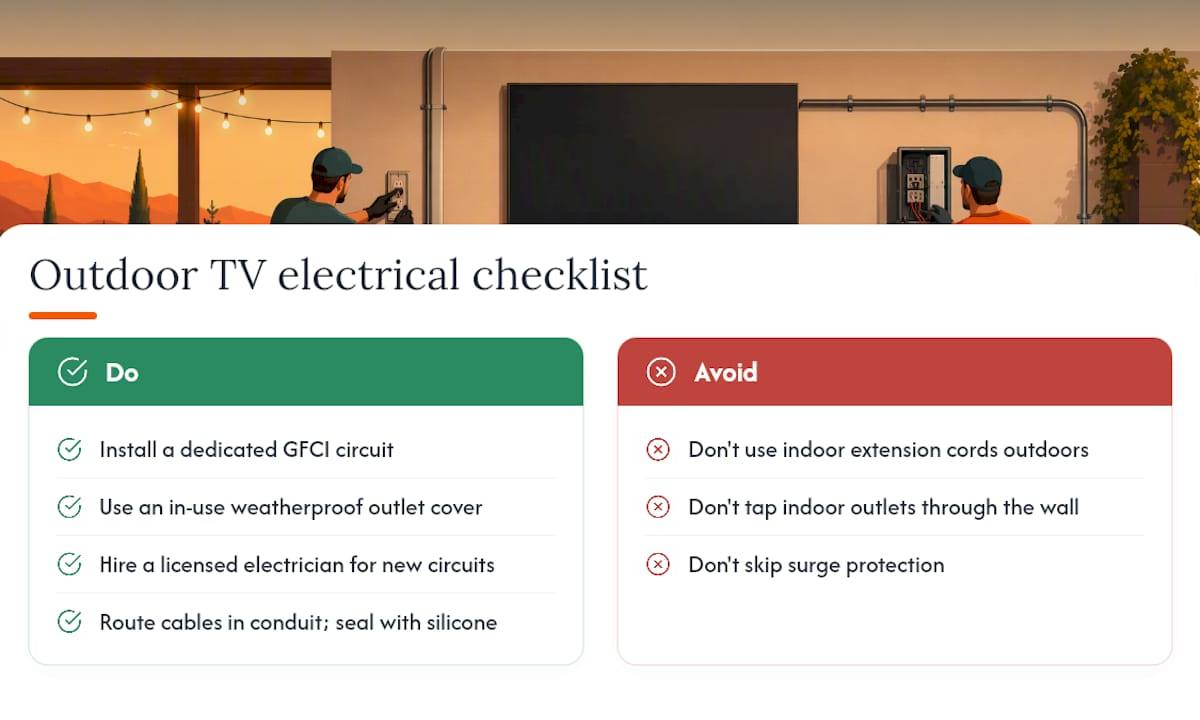
The power supply for any outdoor TV must come from a dedicated GFCI-protected circuit with an in-use weatherproof outlet cover. GFCI protection cuts power instantly if moisture contacts the circuit, which is the primary electrical hazard in outdoor installs. Professionals are consistent on this point: never use a standard indoor extension cord outdoors, never tap an existing indoor outlet through the wall without proper weatherproofing, and always add surge protection between the outlet and the TV.
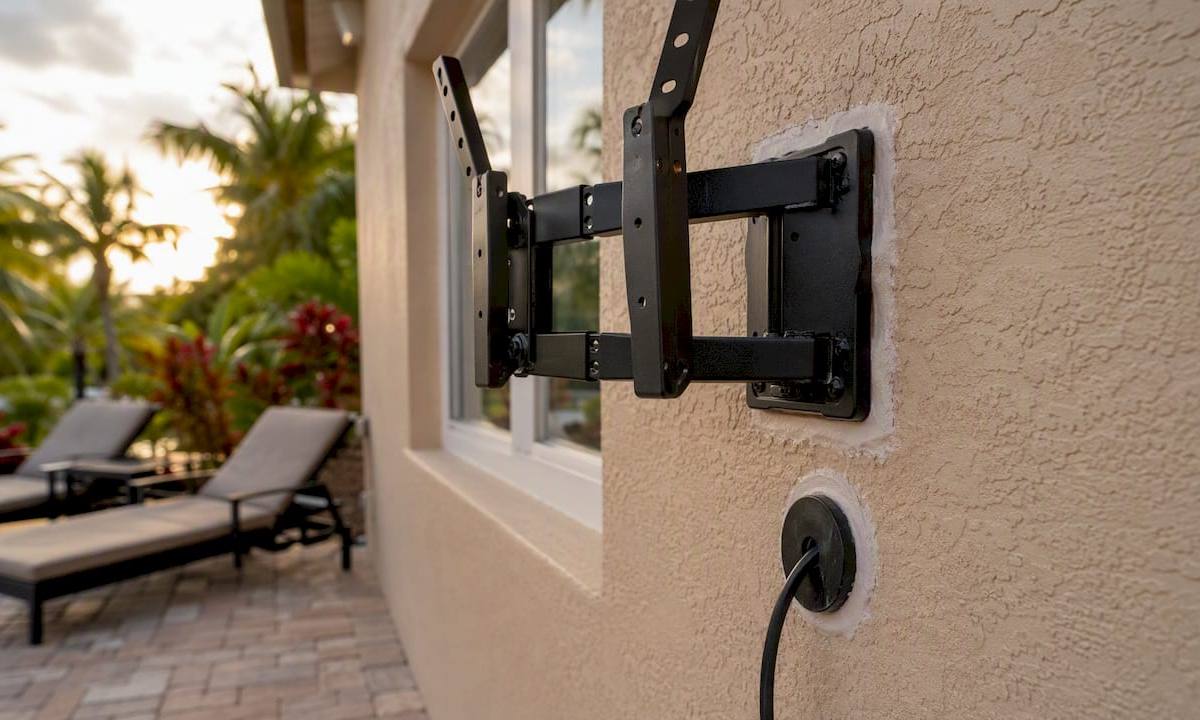
A recessed weatherproof electrical box with a siding flange creates a clean, sealed install. It sits flush behind the TV, hides the cord, and reduces water intrusion risk compared to a surface-mounted box. This Old House recommends this approach specifically for enclosure installs, feeding the outdoor-rated power cord through a sealed grommet into the enclosure.
If you don’t already have a GFCI outlet in the right location, hire a licensed electrician. Running a new circuit, sizing the wire correctly, pulling it through conduit, and installing a weatherproof box to code is not a DIY task in most jurisdictions. The This Old House wiring guidance specifies GFCI-protected breakers, appropriately sized wire in conduit, and in-use covers for all plugged connections.
Cable routing: Use outdoor-rated HDMI cables or run coax with a media converter for longer runs. Route cables through conduit where exposed. Create a drip loop at any cable entry point so water runs down and away from the penetration rather than into it. For streaming sources kept indoors, an IR repeater kit lets the remote signal pass through the wall without drilling a large hole. Seal every cable entry with silicone after routing.
Step-by-step mounting checklist for a DIY outdoor install
This sequence assumes you already have a GFCI outlet in place and your mount, hardware, and TV on hand.
- Unbox and inspect the TV and mount for shipping damage before drilling anything.
- Mark the mount position on the wall at the correct height, accounting for the mount’s offset from center.
- Locate studs or masonry anchors using a stud finder; confirm with a small probe bit before committing.
- Check for obstructions (wiring, plumbing, insulation) behind the drill points using a borescope or inspection camera if available.
- Drill pilot holes at marked stud locations using a hammer drill for masonry or a standard drill for wood framing.
- Attach the mount bracket to the wall using stainless steel lag bolts; torque to spec and verify the bracket is level.
- Seal around each bolt with exterior-grade silicone immediately after tightening.
- Route cables through conduit or wall, creating a drip loop at the entry point; seal the entry with silicone.
- Lift and attach the TV with a second person; never attempt a solo lift for anything over 40 lbs.
- Connect power and signal cables, verify the outlet is GFCI-protected, and power up.
- Test Wi-Fi connectivity, IR remote control, and picture quality.
- Inspect seals after the first rain and re-apply silicone anywhere water intrusion is visible.
Tools needed: hammer drill, standard drill, level, stud finder, socket set, silicone caulk gun, and a torque wrench for lag bolts. Two people for the lift, always.
Sealing every penetration with silicone and using stainless fasteners is the single most cited best practice among professional installers. Skip it and moisture finds its way in within one rainy season.
Which accessories make an outdoor entertainment system worth it?
The TV is only part of the setup. Sound, streaming, and power protection all need outdoor-specific solutions.
Sound: Standard TV speakers are inadequate outdoors because ambient noise competes with audio. An outdoor-rated soundbar mounted directly below the TV is the simplest upgrade. For larger spaces, a pair of outdoor speakers placed at the seating perimeter provides better coverage. Forever Glow’s outdoor audio and entertainment resource covers integrated speaker placement for patios and entertainment spaces if you want to go deeper on distributed audio.
Streaming and control: A weatherproof streaming stick (or a standard stick placed inside a ventilated enclosure) handles most streaming needs. If the source device stays indoors, an IR repeater kit passes remote signals through the wall cleanly. For reliable streaming, extend your Wi-Fi with an outdoor-rated access point rather than hoping the indoor router reaches the patio. A wired Ethernet drop to an outdoor media box is the most reliable option for 4K streaming.
Power protection: An outdoor-rated surge protector between the outlet and the TV is non-negotiable in Florida, where lightning is a seasonal reality. A lightning arrestor on the coax line adds another layer of protection. Use brush plates or grommets at every cable wall entry to keep insects out, a real concern in Southwest Florida.
How do you maintain and winterize an outdoor TV?
Florida homeowners don’t face the same hard-freeze winterizing challenges as northern climates, but storm season and high humidity create their own maintenance demands.
Routine maintenance checklist:
- Clean the screen monthly with a microfiber cloth and screen-safe cleaner; avoid pressure washing near the TV.
- Inspect all silicone seals and cable glands every six months; re-apply where cracking or separation is visible.
- Tighten all mount fasteners annually, as thermal expansion and contraction loosen hardware over time.
- Test internal fans and heaters (on enclosed outdoor models) at the start of each season.
- Check the GFCI outlet monthly by pressing the test and reset buttons.
Storm season actions: Use a fitted weatherproof TV cover during tropical storm watches. For non-outdoor TVs in enclosures, consider removing the TV entirely during extended off-season periods or when a major hurricane threatens. Inspect all electronics after any extreme weather event before powering back on.
Warranty note: Register your outdoor TV immediately after purchase. Most manufacturer warranties for outdoor-rated TVs cover defects but exclude damage from improper installation, power surges, or flooding. Keep receipts for all professional work, including electrician invoices, as proof of compliant installation can matter in warranty claims. Seasonal opening and closing services can handle the prep and post-storm inspection if you’d rather not do it yourself.
What does outdoor TV installation actually cost?
Costs vary widely based on whether you’re buying a purpose-built outdoor TV or using an enclosure, and whether new electrical work is needed.
Dedicated outdoor TVs and commercial-grade panels are substantially more expensive than enclosure solutions, which is why many homeowners start with an enclosure and upgrade later. A straightforward mount-and-connect job with an existing outlet typically takes two to four hours. Add a new circuit and conduit run and you’re looking at a full day or more, depending on the distance from the panel and wall construction.
Permits, where required, add cost and time. Budget $50–$150 for a typical electrical permit, plus inspection scheduling that can add a day or two to the timeline.
When should you hire a professional instead of doing it yourself?
Some installs are genuinely DIY-friendly. Others have enough complexity or safety risk that hiring a pro is the smarter call, not just the easier one.
Hire a pro when:
- You need a new dedicated circuit or GFCI outlet installed.
- The TV plus enclosure exceeds 80 lbs and the wall requires structural backing.
- The install is fully exposed to sun, wind, and rain with no overhead cover.
- Cable concealment requires cutting into siding, stucco, or masonry.
- Local permits are required for the electrical work.
- You’re mounting to a surface you can’t verify (older construction, hollow block, or unknown framing).
Questions to ask before booking:
- Are you licensed and insured for electrical work in Florida?
- How do you handle the GFCI circuit and outlet weatherproofing?
- Have you installed outdoor enclosures before? Can you show photos?
- What hardware do you use, and is it stainless steel?
- Do you pull permits when required?
- What warranty do you offer on the labor?
Red flags to watch for: any installer who suggests using an indoor extension cord outdoors, who can’t explain their GFCI approach, who uses standard zinc hardware, or who dismisses the permit question. A reputable installer will have a clear answer for every one of those questions. For local hiring guidance, the TV mounting hiring guide covers credential verification in detail.
How do you protect an outdoor TV from theft or vandalism?
A mounted outdoor TV is visible from the street or neighboring properties in many installations, which makes security worth planning before the install rather than after.
The most effective deterrent is a locking mount or a lockable enclosure with a keyed hasp. Several outdoor TV enclosure manufacturers offer models with locking mechanisms built in. For open-air installs without an enclosure, a security cable looped through the TV’s VESA holes and anchored to the mount adds a physical barrier. Motion-activated lighting near the TV discourages opportunistic theft, and a visible security camera pointed at the installation area is a stronger deterrent than any physical lock alone.
For high-value installs in exposed locations, consider a pop-up or flip-down enclosure that conceals the TV entirely when not in use. A TV that isn’t visible is a TV that isn’t targeted.
Do you need permits for an outdoor TV installation?
The electrical work almost always triggers a permit requirement; the mounting itself usually does not.
In most U.S. jurisdictions, running a new circuit from the electrical panel to an outdoor outlet requires an electrical permit and a licensed electrician. The permit process involves submitting a work description, paying a fee (typically $50–$150 for a residential electrical permit, though this varies by county), and scheduling an inspection after the work is complete. In Florida, Collier and Lee counties both require permits for new electrical circuits.
The TV mount itself, attached to an existing structure without structural modification, generally does not require a separate permit. However, if the install involves cutting into a load-bearing wall, adding structural backing, or modifying the building envelope, a building permit may apply. When in doubt, call your local building department before starting work. Unpermitted electrical work can create problems with homeowner’s insurance claims and property sales.
Grounding and lightning protection for outdoor TVs
Florida averages more lightning strikes per square mile than almost any other state, which makes grounding a practical necessity rather than an optional upgrade.
A properly installed GFCI circuit provides ground-fault protection, but it does not protect against a direct or near lightning strike. For that, you need a whole-home surge protector at the electrical panel, a point-of-use surge protector at the outdoor outlet, and a coaxial lightning arrestor on any antenna or cable line feeding the TV. The coax arrestor connects between the incoming line and the TV and diverts the surge to ground before it reaches the electronics.
Proper grounding of the mount itself matters too. Metal mounts attached to a grounded structure are generally safe, but an isolated metal post or a mount on a non-conductive surface should be bonded to the home’s grounding system by a licensed electrician. This is a detail most DIY guides skip, and it’s one of the reasons a licensed electrician is worth the cost on complex outdoor installs.
How do you arrange seating for the best outdoor viewing angles?
The geometry of outdoor viewing is less forgiving than indoors because you can’t easily move walls, and the sun doesn’t cooperate.
Most flat-panel TVs maintain acceptable picture quality within 30 degrees of center horizontally. Beyond 45 degrees, color accuracy and contrast drop noticeably, especially on LCD panels. Design your seating arrangement so no chair sits more than 30 degrees off the screen’s horizontal center axis. For a wide patio with seating on both sides, a full-motion mount that can swing 15–20 degrees left or right helps cover the range without asking guests to crane their necks.
Vertical viewing angle matters too. A screen mounted too high forces everyone to look up, which causes neck strain during a two-hour game. The center of the screen should land at or just slightly above seated eye level, roughly 42–48 inches from the floor for standard patio chairs. Lounge chairs sit lower, so account for that if your seating is primarily reclined.
For large outdoor spaces with seating at 20+ feet, consider two smaller screens rather than one very large one. Coverage is more even, and you avoid the brightness falloff that affects very large panels at distance.
What most DIY outdoor installs get wrong
The mistakes that show up most often on residential outdoor installs aren’t about skill. They’re about assumptions.
The most common one: assuming a covered patio is “basically indoors.” It isn’t. Humidity, temperature swings, insects, and reflected light all behave very differently under a soffit than inside a climate-controlled room. An indoor TV mounted under a covered lanai without an enclosure or outdoor rating will typically show corrosion, condensation damage, or insect intrusion within one to two Florida summers.
The second most common mistake is skipping the weight calculation. A homeowner picks a mount rated for 100 lbs, buys a 55-inch TV, and figures they’re fine. Then the enclosure arrives and adds 60 lbs to the equation. The mount is now undersized, and the wall anchors are carrying a load they weren’t designed for. Pros check the combined weight before ordering hardware, not after.
Electrical shortcuts are the third pattern. A standard outdoor-rated extension cord run from an interior outlet through a drilled hole is not a compliant or safe installation. It’s a common workaround that bypasses GFCI protection and creates a water intrusion path directly into the wall. A dedicated circuit with a recessed weatherproof box costs more upfront and pays for itself the first time a storm rolls through.
Fixmovehaul’s installers in Naples, Bonita Springs, Lee County, Collier County, and Estero handle all three of these issues on nearly every job. Same-day availability means you’re not waiting a week to get it done right.
Fixmovehaul handles outdoor TV installation across Southwest Florida
Skip the weekend project. Fixmovehaul’s TV mounting service in SWFL covers the full outdoor install: stainless steel hardware, outdoor-rated mount selection, GFCI outlet coordination with a licensed electrician, and basic cable concealment, all in one visit. Same-day availability means the job gets done when you need it, not when a contractor’s schedule opens up.

Serving Naples, Bonita Springs, Lee County, Collier County, and Estero, Fixmovehaul brings the tools, the hardware knowledge, and the local experience to get your outdoor setup mounted safely and correctly. Need the TV picked up from Home Depot or Lowe’s first? That’s covered too with big-box pickup and delivery. Book your outdoor TV install at Fixmovehaul and get a straight answer on availability today.
Sources
- Installing an Outdoor TV
- How to Mount an Outdoor TV Enclosure - This Old House
- Mastering Outdoor TV Installation: Your Complete Step-by-Step Guide – Furrion