How to Mount a TV on Metal Studs: Safe Hardware Guide
How to Mount a TV on Metal Studs: Safe Hardware Guide
Yes, you can safely mount a TV on metal studs. The key is using the right anchors. Standard wood screws will strip right out of thin-gauge steel framing, but rated toggle anchors or a plywood backer board give you a solid, lasting hold.
Two approaches work reliably:
- Toggle anchors (strap/snap toggles): The go-to for most installs. A SnapToggle-style anchor deploys a metal channel behind the drywall and distributes load across the stud web. Use these for fixed or tilting mounts on most consumer TVs within typical weight ranges.
- Wood backer board: For heavy TVs, full-motion mounts, or studs spaced 24" apart, screw a 3/4" plywood panel across at least two studs, then attach your mount to the wood with standard lag bolts.
Quick do/don’t:
- Do use a magnetic or metal-capable stud finder and confirm with a rare-earth magnet or small pilot hole
- Do use rated metal-stud toggle anchors or Tek self-drilling screws for a backer
- Don’t use standard lag screws or wood screws alone in metal studs
- Don’t skip the wiring check before drilling
Pro Tip: If you’re in Southwest Florida and would rather skip the hardware store run, Fixmovehaul offers same-day TV mounting across Naples, Estero, Fort Myers, and Cape Coral.
Key Takeaways
Rated toggle anchors or a plywood backer board are the only reliable ways to mount a TV on metal studs — standard wood screws will strip out of thin-gauge steel framing under load.
| Point | Details |
|---|---|
| Use rated toggles or a backer | SnapToggle-style anchors or 3/4" plywood backer are the two safe options for steel-stud walls. |
| Check stud gauge and spacing | 25-gauge studs and 24" spacing are common in condos; both affect which method you should use. |
| Safety margin matters | Size anchors to at least 3x–4x the combined TV and mount weight; use all available bracket holes. |
| Full-motion mounts need a backer | Dynamic loads from articulating arms work toggles loose over time; a backer board is the correct fix. |
| Fixmovehaul covers the full install | Same-day TV mounting across Southwest Florida, including anchor selection, backer install, and load testing. |
Table of Contents
- What tools and anchors actually work for a TV mount on metal studs?
- How to install a TV mount on metal studs, step by step
- How much weight can metal-stud anchors hold, and when do you need a backer?
- When should you use a wood backer instead of toggles?
- Common mistakes when mounting to metal studs and how to fix them
- What to buy: anchors, kits, and what to check on the label
- When should you hire a pro instead of doing it yourself?
- What on-site installs actually teach you about metal studs
- Fixmovehaul handles TV mounting in Southwest Florida so you don’t have to
- Sources
What tools and anchors actually work for a TV mount on metal studs?
Before you drill a single hole, get the right gear. The wrong anchor is the single most common reason a TV bracket fails on steel framing.
Tools you need
- Magnetic or metal-capable stud finder (standard wood-optimized finders often misread metal framing)
- Drill with cobalt or titanium metal bits (standard wood bits dull fast on steel)
- Socket driver or screwdriver
- 4-ft level or laser level
- Tape measure and pencil
- Non-contact voltage tester (before drilling near outlets)
- Rare-earth magnet (optional but useful for confirming stud edges by finding drywall screws)
Anchors that actually hold
Confirming stud placement with a magnet or pilot hole matters because electronic finders can give false positives on metal framing. Once you know where the studs are, choose your anchor:
- Strap/snap toggles (SnapToggle/TOGGLER-style): The strongest option for most TV mounts. A metal channel deploys behind the stud and locks in place. Rated pull-out capacities run into the hundreds of pounds per anchor when installed correctly.
- Heavy-duty wing toggles: Wider deployment, good for thicker drywall. Slightly harder to install precisely but effective for medium-weight TVs.
- Tek (self-drilling) screws: Not for anchoring a mount directly to the stud. Use these to fasten a plywood backer board across multiple studs, then lag-bolt your mount into the wood.
Pre-packaged steel-stud mounting kits from brands like EchoGear and SANUS take the guesswork out of sizing. The EchoGear steel-stud kit includes UL-rated SnapToggle anchors, a correctly sized steel-stud drill bit, screws, and washers. Manufacturer guidance rates that kit for fixed and tilt mounts up to a moderate weight when installed per instructions. One purchase, no measuring drill bits at the store.
Pro Tip: Drive toggle bolts to about 90% tight with your drill, then finish the last turns by hand. Over-torquing crushes the thin stud web and destroys the anchor’s holding power.
How to install a TV mount on metal studs, step by step
Use rated toggles or a backer board. Here is the full workflow.
- Plan your height. Center the screen at roughly 40–42 inches from the floor to seated eye level. Mark that point lightly with a pencil.
- Locate the studs. Run your metal-capable stud finder across the wall. Mark both edges of each stud, then verify with a rare-earth magnet by finding the drywall screws. Studs are typically 16" or 24" on center.
- Drill a small pilot hole. Confirm stud placement with a 1/8" pilot hole before committing to the full toggle-sized hole. This takes 30 seconds and prevents a misplaced large hole.
- Mark your bracket holes. Hold the bracket against the wall at your target height, use a level, and mark every mounting hole you plan to use. Fill as many holes as possible — more anchors means less load per anchor.
- Drill to toggle diameter. Most 1/4" SnapToggles require a 1/2" hole. Check your anchor’s packaging for the exact drill size and use a cobalt bit.
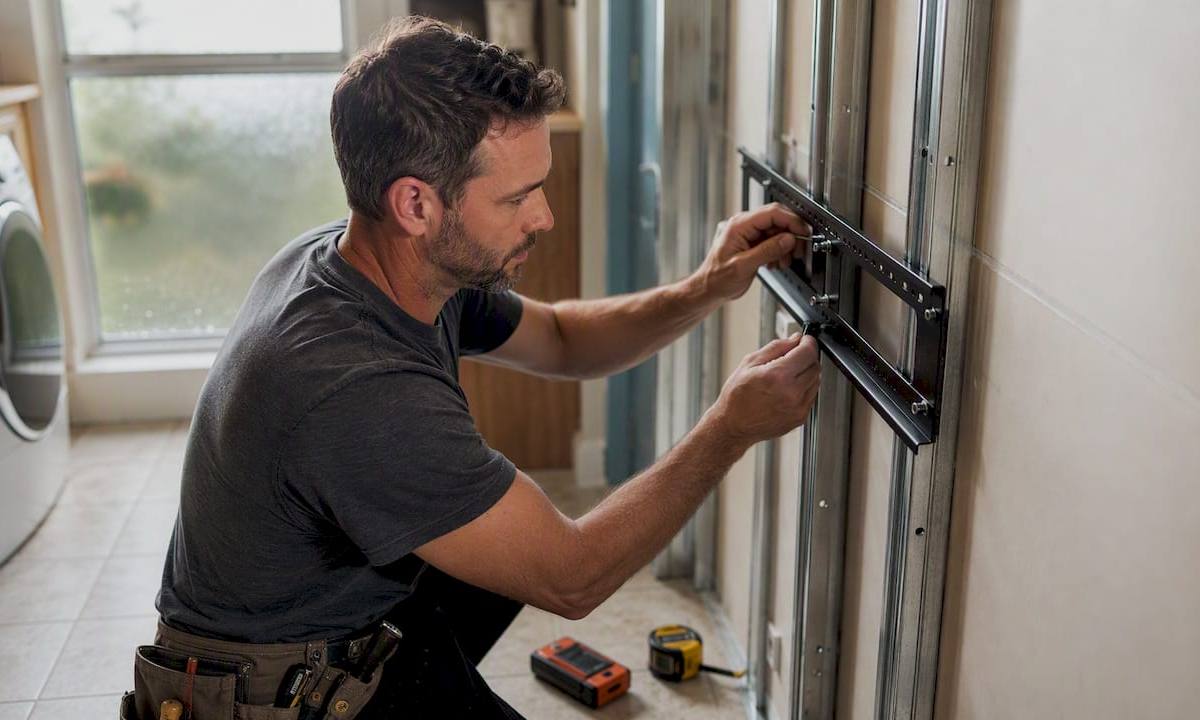
- Install the toggles. Fold the toggle channel, insert through the hole, and pull back until the channel locks flat against the back of the drywall and stud. Thread the bolt through your bracket and tighten.
- Tighten correctly. Drive to about 90% with the drill, then hand-finish. Crushing the stud web is a real risk with thin 25-gauge steel.
- Attach the bracket and test. Before hanging the TV, grab the bracket with both hands and apply firm pressure in every direction. Any movement means an anchor didn’t deploy correctly. Fix it now, not after the TV is up.
- Hang the TV and route cables. Once the bracket passes the pull test, hang the TV per the mount’s instructions and route cables through a wall cable management kit or conduit.
Safety checks before drilling: Use a non-contact voltage tester near any outlet or switch on the same wall. Plumbing runs vertically in exterior walls and horizontally near fixtures. When in doubt, drill a small exploratory hole and use a flexible inspection camera before going full diameter.
How much weight can metal-stud anchors hold, and when do you need a backer?
Thin-gauge metal studs — commonly 25 or 20 gauge, with a web thickness of roughly 0.02 to 0.04 inches — simply don’t give a wood screw anything to bite into. The screw threads spin in the steel and pull free under load. Toggle anchors work differently: they clamp a metal channel against the back face of the stud, so the load is distributed across a much wider area rather than relying on thread engagement alone.
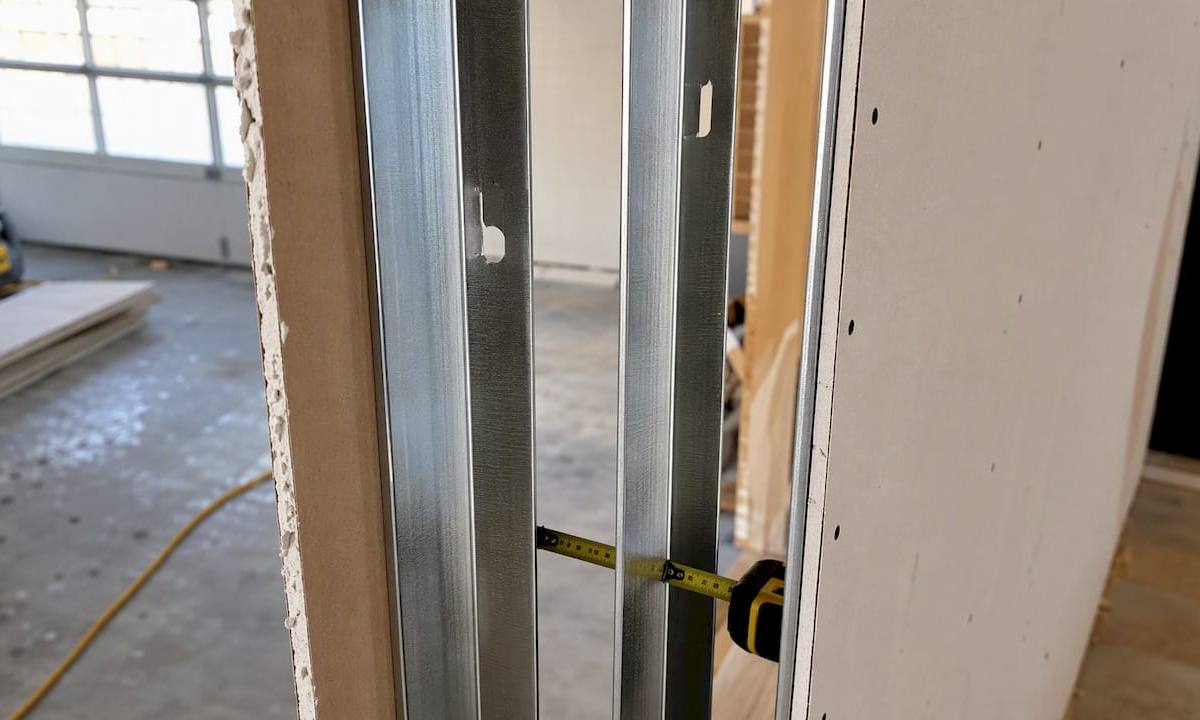
Properly installed 1/4" strap toggles can reach pull-out capacities in the 265–300 lb range in 25-gauge metal stud applications. That sounds like a lot, but a 65" TV plus a full-motion mount can weigh 80–100 lbs, and dynamic loads from extending the arm multiply the stress.
| Anchor type | Typical rated load (per anchor) | Best use case |
|---|---|---|
| 1/4" strap/snap toggle (SnapToggle-style) | 265–300 lbs pull-out | Fixed or tilt mounts, most TVs up to ~80 lbs |
| Heavy-duty wing toggle | 100–200 lbs | Medium TVs, fixed mounts, thicker drywall |
| Tek screw into backer | Depends on backer/lag bolt | Backer installation only, not direct stud anchor |
| Lag bolt into plywood backer | 200+ lbs per bolt | Heavy TVs, full-motion mounts, 24" stud spacing |
Sizing rules of thumb:
- 40–80 lb TV with a fixed or tilt mount: four 1/4" strap toggles across two studs is typically sufficient
- 80–100 lb TV with a tilt mount: use all available bracket holes and confirm you’re hitting at least two stud webs
- 100+ lb TV or any full-motion/articulating mount: install a plywood backer
Full-motion mounts place additional leverage on anchors when the arm is extended. Many steel-stud kit manufacturers explicitly recommend fixed or tilting mounts only unless a backer or multiple heavy-duty anchors reinforce the install. That’s not a suggestion — it’s a load physics issue.
When should you use a wood backer instead of toggles?
A backer board is the right call in four situations: the TV and mount together exceed 100 lbs, you’re using a full-motion mount, studs are spaced 24" apart and your bracket holes won’t align with two of them, or you’ve confirmed the studs are thin-gauge and the wall feels soft.
Materials you need
- 3/4" plywood (at least 3/4" thick for lag bolt engagement)
- Tek self-drilling screws or sheet-metal screws rated for metal framing
- Standard lag bolts (for attaching the TV mount to the backer)
- Stud finder and level
How to install a backer board
- Locate and mark at least two studs in the target area.
- Cut the plywood to span both studs with a few inches of overlap on each side.
- Hold the plywood against the wall at the correct height and mark the stud locations on it.
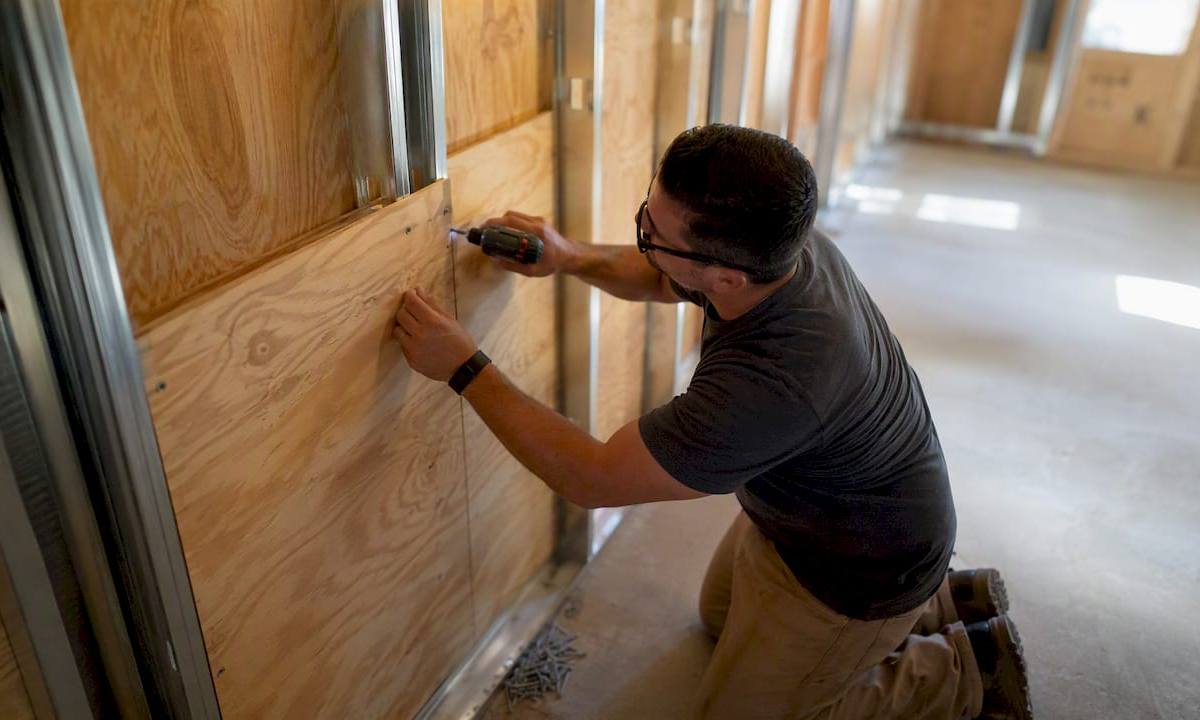
- Drive Tek self-drilling screws through the plywood and into each stud at multiple points. Use at least three screws per stud contact point to spread shear load.
- Confirm the backer is level and doesn’t flex when you push on it.
- Attach your TV mount bracket directly to the plywood using lag bolts. Standard wood fasteners work here because you’re going into 3/4" wood, not thin steel.
- Run the pull test before hanging the TV.
If the wall is accessible from another room or the studs are exposed during a renovation, you can install blocking between studs from behind the drywall. That’s the cleanest finish but requires more access.
Pro Tip: When studs are 24" on center and your bracket holes won’t line up, a horizontal plywood board spanning at least two studs solves the spacing problem entirely. Secure it with Tek screws at every stud contact, then mount to the wood.
Common mistakes when mounting to metal studs and how to fix them
Toggle didn’t deploy or pulled through
This happens when the hole is too large for the toggle size or the toggle was inserted at an angle. Remove the bolt, inspect the channel. If the hole is oversized, move to a fresh location at least 2" away. If the stud deformed, that location is compromised — install a backer board instead of trying again in the same spot.
Over-tightening that deforms the stud
You’ll feel it: the bolt suddenly spins freely or the bracket shifts. The stud web has been crushed. Stop immediately. Remove the anchor, assess whether the stud is still structurally sound, and either spread the load with additional anchors at new locations or install a backer board across that section.
Wrong or undersized anchors
Signs of creep: the bracket slowly tilts over days or the TV shifts position. This usually means the anchors were rated for drywall only, not metal framing. Replace with rated metal-stud toggles and use every available bracket hole.
Stud finder false positives:
- Run the finder twice in opposite directions and mark where both passes agree.
- Verify with a rare-earth magnet by sliding it slowly across the wall until it catches on a drywall screw.
- Drill a 1/8" pilot hole at your confirmed mark before committing to the full toggle hole.
Patching stripped holes
Fill stripped toggle holes with a drywall patch compound or a mesh patch kit. Let it cure fully (typically 24 hours), sand smooth, and move your anchor location at least 3" from the repair. Never re-anchor into a patched hole in metal framing.
Pro Tip: If you hit a stud at 24" spacing and your bracket only spans one stud, don’t force it. Either use a wider bracket that reaches two studs or install a backer. A single-stud install on a full-motion mount is the most common failure point.
What to buy: anchors, kits, and what to check on the label
Shopping checklist
- 1/4" strap/snap toggles (SnapToggle or TOGGLER brand): Check the rated pull-out load per anchor on the packaging. Look for manufacturer test data, not just a maximum weight claim.
- EchoGear steel-stud mounting kit: Includes UL-rated SnapToggle anchors, a correctly sized drill bit, screws, and washers. Designed for fixed and tilt mounts.
- SANUS steel-stud hardware kit: Similar scope, includes anchors and hardware for fixed or tilt mounts. Check the product page for mount compatibility notes.
- Cobalt or titanium metal drill bit set: Don’t use wood bits on steel studs.
- Tek self-drilling screws: For backer installation only. Buy screws long enough to penetrate the stud flange and web.
What to verify on the label before buying
- Rated load per anchor (not just “total system” weight)
- UL listing or manufacturer test documentation
- Included drill bit size (kits that include the bit save a sizing mistake)
- Compatibility note: “for metal studs” or “for steel framing” specifically, not just “heavy-duty drywall”
- Mount type compatibility: most kits specify fixed or tilt only; full-motion requires a backer or a kit that explicitly supports articulating mounts
Cost ballpark
Individual SnapToggle anchors typically run $1–$3 each at hardware stores. Pre-packaged steel-stud kits (EchoGear, SANUS) generally fall in the $20–$40 range and include everything for a single install. A 3/4" plywood sheet for a backer board costs roughly $40–$60 at a big-box store. Total hardware cost for a DIY install usually lands between $25 and $80 depending on the approach.
When should you hire a pro instead of doing it yourself?
Some installs are genuinely DIY-friendly. Others are not.
Call a pro when:
- The TV is 65" or larger, or the combined TV and mount weight exceeds 80 lbs
- You’re using a full-motion or articulating mount
- You can’t confirm stud gauge or spacing without opening the wall
- The wall has known wiring, plumbing, or fire-blocking that complicates routing
- You’re in a condo or multi-family building with HOA rules about wall penetrations
- You’ve already stripped a hole and aren’t sure the wall is still sound
What a professional installer does on site:
- Confirms stud gauge and spacing with a combination of electronic and physical checks
- Selects the correct anchor type and size for the TV weight and mount type
- Installs toggles or a backer board with proper torque and redundancy
- Tests the bracket under load before hanging the TV
- Conceals cables through the wall or via surface conduit
- Leaves you with a documented install and, in most cases, a warranty on the labor
Cost drivers for a professional install include travel fee, mount complexity (fixed vs. full-motion), number of anchors or backer labor, and cable concealment. Local rates in Southwest Florida typically range from $75 to $200 for a standard install, with full-motion or backer installs at the higher end.
Fixmovehaul offers TV mounting in Southwest Florida across Naples, Estero, Fort Myers, Cape Coral, and Bonita Springs, with same-day availability and the option to bundle pickup and delivery if you still need the mount or hardware sourced.
What on-site installs actually teach you about metal studs
The most useful thing you learn doing these installs in person is that 25-gauge studs are thinner than most homeowners expect. When you hold a piece of 25-gauge steel framing, it flexes noticeably. That’s the material your TV is hanging from.
The decision between toggles and a backer usually comes down to one question: is the mount going to move? Fixed and tilt mounts stay put, so the load is static and toggles handle it well. Full-motion mounts get extended, retracted, and swung sideways repeatedly. That dynamic load is what causes toggle anchors to slowly work loose over months, even when they were installed correctly.
In condos specifically, 24" stud spacing is common, and bracket holes rarely line up with two studs without a backer. Seeing that in the field is what makes the backer recommendation feel less like caution and more like the obvious call.
One safety reminder worth repeating: in Southwest Florida, a lot of condo walls run electrical horizontally between units and vertically near HVAC chases. Always use a non-contact voltage tester before drilling, not just a stud finder.
Fixmovehaul handles TV mounting in Southwest Florida so you don’t have to
Sourcing the right hardware, confirming stud gauge, drilling clean holes, and testing load before the TV goes up takes about two hours if you know what you’re doing. If you don’t, it takes longer and the margin for error is real.

Fixmovehaul’s TV mounting service covers the full job: on-site stud assessment, anchor or backer installation, bracket mounting, cable concealment, and a post-install load test before we leave. Same-day appointments are available across Naples, Estero, Fort Myers, Cape Coral, and Bonita Springs. If you still need the mount or hardware picked up from Home Depot or Lowe’s, that’s a bundled add-on we handle on the same visit. Flat-rate pricing, no surprise fees. Book your install at Fixmovehaul.
Sources
Always follow the anchor and mount manufacturer’s installation instructions and rated load specifications. These pages are worth reading before you buy or drill:
- How to mount a TV on metal studs, brick, concrete & plaster
- Steel Stud TV Mounting Kit For Tilt & Low Profile TV Mounts - EGHWSS
- How To Mount A Tv With Metal Studs – The Ultimate Guide For Secure
- How to Install a TV Mount Into Metal Studs