Outdoor Kitchen Cleaning: DIY Steps and When to Hire a Pro
Outdoor Kitchen Cleaning: DIY Steps and When to Hire a Pro
Your outdoor kitchen is ready for a deep clean when you can answer yes to any of these: the grates have visible carbon buildup, the grease trap hasn’t been emptied in more than a month, or the stainless surfaces have rust spots forming. If the answer is yes to all three, call a pro. If it’s just one, a focused DIY session handles it.
Before you touch anything, run through these immediate safety steps:
- Turn off the gas supply valve and disconnect the propane tank or shut off the natural gas line at the shutoff.
- Power down any pellet grill at the controller and wait for the auger to stop completely.
- Let all burners and grates cool to room temperature (at least 30 minutes after last use).
- Remove loose ash from charcoal grills or smokers before any wet cleaning begins.
Bon Appétit’s guide to cleaning your grill makes the same point: cleaning warm grates (not hot) is the sweet spot where grease is still malleable and carbon hasn’t fully bonded. That five-minute window after cooking, before everything hardens, does more for your grill’s longevity than any quarterly deep clean.
Table of Contents
- How to deep clean your grill yourself, step by step
- How to clean each material without damaging it
- What tools and cleaners do you actually need?
- How often should you clean your outdoor kitchen?
- What does outdoor kitchen cleaning typically cost?
- When should you call a professional instead of doing it yourself?
- How Fixmovehaul handles outdoor kitchen and lanai cleaning in Southwest Florida
- How to dispose of grease and cleaning chemicals responsibly
- How to protect your outdoor kitchen after cleaning
- Key Takeaways
- What crews actually see, and what it means for your decision
- Fixmovehaul makes outdoor kitchen care easy in Southwest Florida
- Selected sources and further reading
How to deep clean your grill yourself, step by step
Pre-clean safety checklist
Disconnect gas or propane. Confirm the pellet grill controller is off and the auger has stopped. Put on rubber gloves and eye protection before using any degreaser. Work in a ventilated area if you’re using chemical cleaners.
Tools and supplies
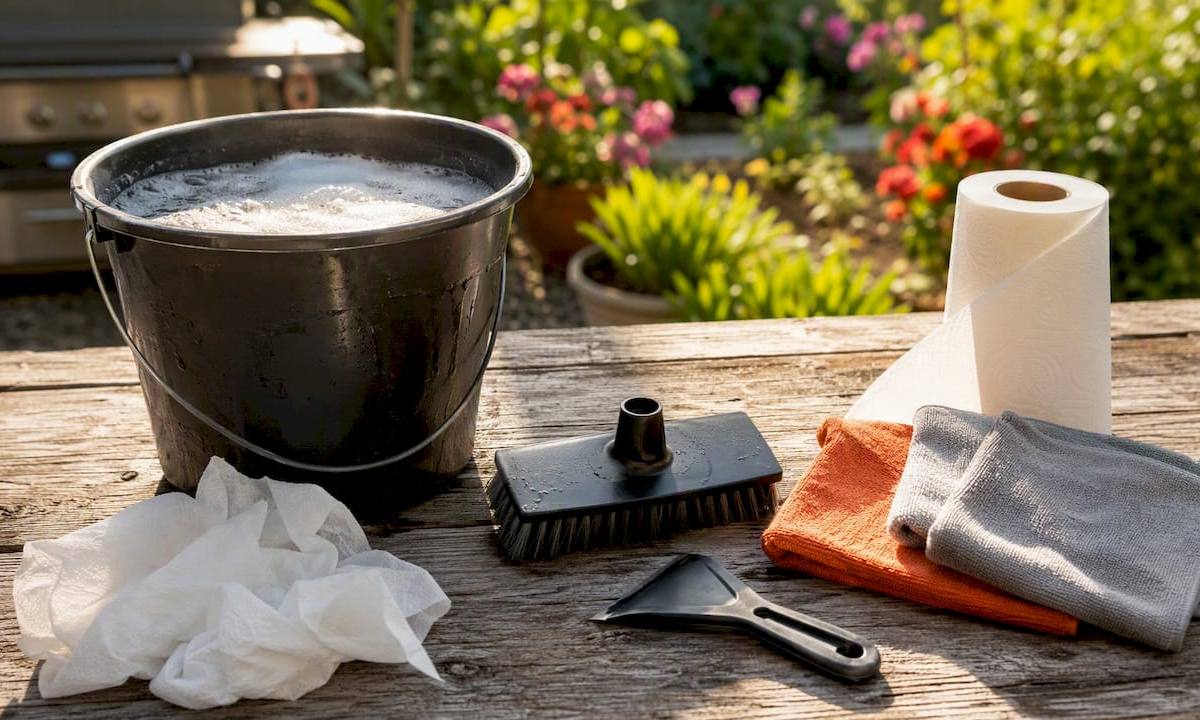
Shop vac or handheld vacuum, stiff-bristle grill brush (nylon for porcelain-coated grates, stainless-wire for cast iron), plastic scraper, microfiber cloths, bucket, mild dish soap, baking soda paste, commercial food-safe grill degreaser, and paper towels.
Gas grill (Weber, Napoleon, Lynx)
Weber’s deep-clean guide recommends full component removal for any thorough service:
- Remove grates and soak in hot soapy water.
- Lift out heat diffusers or flavorizer bars and scrape off carbon deposits.
- Remove burners carefully, noting their orientation. Clean burner ports by brushing lengthwise (never across the ports, which pushes debris in).
- Scrape the cook box floor into the grease tray, then wipe with a damp cloth and degreaser.
- Empty and wash the grease tray.
- Scrub soaked grates, rinse, and dry completely.
- Reassemble in reverse order. Do a test fire on low for five minutes to burn off any soap residue.
Charcoal grill
- Remove and dispose of all ash (never into a plastic bag while warm).
- Scrape the firebox walls and bottom with a plastic scraper.
- Wash the grates with hot soapy water and a stiff brush.
- Wipe the interior with a damp cloth. Avoid soaking cast-iron components.
- Check the vents for ash blockage and clear them.
Pellet grill (Traeger and similar)
- Power down completely at the controller and unplug.
- Empty the hopper of remaining pellets. Leftover pellets absorb moisture and swell, jamming the auger.
- Vacuum the fire pot and ash cup thoroughly with a shop vac.
- Remove and clean the drip tray and heat deflector.
- Wipe the interior walls with a dry cloth (avoid water near the RTD temperature probe).
- Serious Eats’ grill cleaning guide notes that emptying ash and hoppers before storage prevents moisture retention and corrosion during off-season storage.
Smoker
- Remove grates and clean as above.
- Clean the fire pot and check the auger opening for blockage.
- Scrape the smoke chamber walls. A thin layer of seasoning is fine; heavy flaking carbon is not.
- Empty and wash the water pan and grease bucket.
- Reassemble and run a short burn to re-season the interior.
Food-safe final step for all types: After reassembly, wipe cooking surfaces with a paper towel lightly coated in high-smoke-point oil (canola or vegetable). This protects the metal and leaves a food-safe surface ready for the next cook.
How to clean each material without damaging it
Stainless steel
Clean with the grain, always. Scrubbing across the grain creates micro-scratches that trap moisture and accelerate rust. Trex Outdoor Kitchens’ cleaning guide is explicit: avoid steel wool, abrasive pads, and chloride-based cleaners on stainless. Use alkaline, non-chloride cleaners, rinse thoroughly, and dry the surface completely after every wash. A stainless-steel polish applied monthly keeps the finish protected.
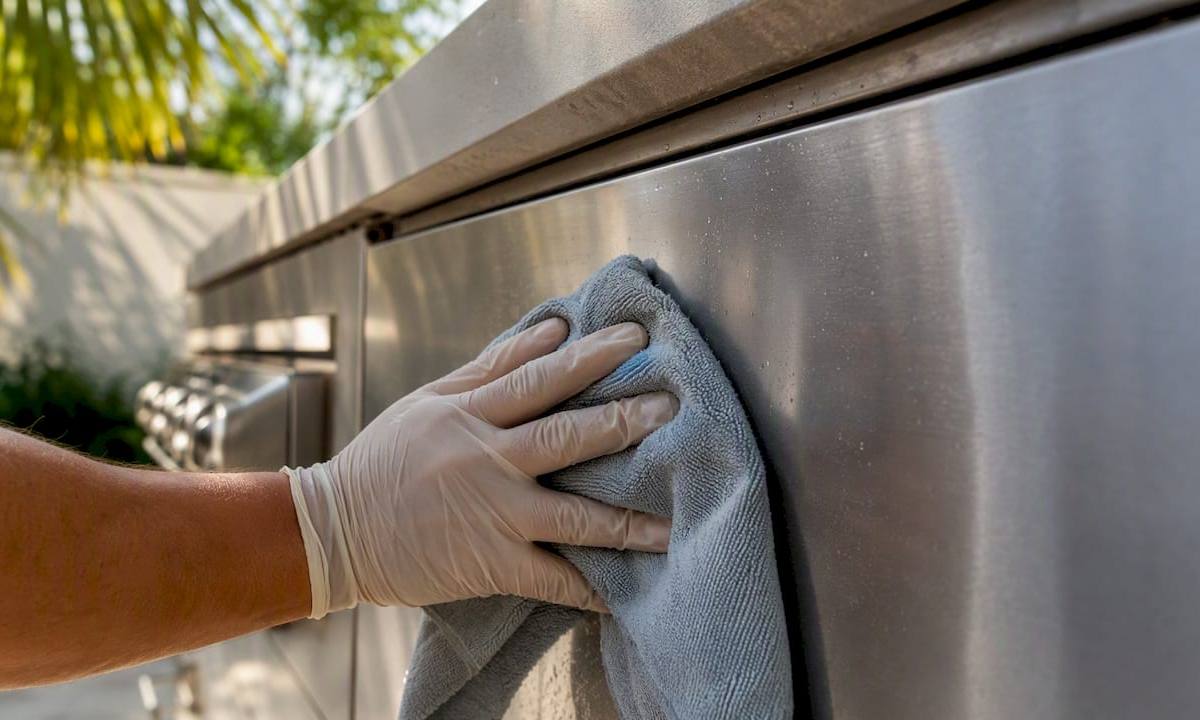
Pro Tip: Lightly buff a used dryer sheet over stainless exterior panels after cleaning. The thin residue left behind reduces fingerprints and water spots between deep cleans. Test on a small area first.
Stone and concrete countertops
Porous natural stone (granite, concrete) needs sealing at least once a year to resist grease and food stains, according to BBQ Host’s maintenance guide. Between sealings, use only pH-neutral cleaners. Acidic cleaners (vinegar, citrus-based products) etch the surface. Treat spills immediately; grease left overnight on unsealed concrete can penetrate permanently.
Wood and composite cabinetry
Use minimal water. A damp cloth with mild soap is enough for routine cleaning. Never aim a pressure washer at cabinet joints or door seals. Theiss’s outdoor kitchen maintenance guide warns that high-pressure water forces moisture into seams and electrical areas, causing long-term structural damage. Apply a UV-protective oil or sealant to natural wood annually. For outdoor cabinetry care, the same principle applies: protect the finish before it fails, not after.
Aluminum and powder-coated surfaces
Mild soap and warm water only. Avoid abrasive scrubbers that scratch the coating. Once powder coat is scratched, bare aluminum is exposed and corrosion starts quickly. Rinse and air-dry.
Cushions and fabrics
Remove cushions before any deep-cleaning session. Spot-clean with mild soap and water, then air-dry completely before storing. Cushions stored damp develop mold within days in humid climates like Southwest Florida.
What tools and cleaners do you actually need?
You don’t need a cabinet full of specialty products. A focused kit covers nearly every surface:
Essential tools:
- Stiff-bristle grill brush (nylon for porcelain grates, stainless-wire for cast iron)
- Plastic scraper (metal scrapers damage coated surfaces)
- Shop vac or handheld vacuum for ash and debris
- Microfiber cloths (several)
- Soft-bristle brush for cabinet faces and countertop edges
- Rubber gloves and eye protection
Safe cleaning agents:
- Mild dish soap (Dawn or equivalent) for grates, trays, and general surfaces
- Baking soda paste for stubborn grease on cast iron
- White vinegar diluted 1:1 with water for light mineral deposits on non-stone surfaces
- Commercial food-safe grill degreaser for heavy carbon buildup in cook boxes
- Stainless-steel polish (non-abrasive) for exterior panels
- pH-neutral stone cleaner for granite and concrete countertops
Safety checklist before you start:
- Gas valve off and propane disconnected
- Pellet grill unplugged and auger confirmed stopped
- All surfaces cooled to room temperature
- Chemical degreasers used only in ventilated areas
- Grease collected in a sealed container for proper disposal (never poured down a drain or into soil)
Food Network’s grill cleaning guide supports deep cleaning every few months for regularly used grills, with more frequent attention for heavy users. Having the right tools on hand means you can act on that schedule without a last-minute supply run.
How often should you clean your outdoor kitchen?
Consistent habits beat marathon scrub sessions. Bon Appétit puts it plainly: quick post-cook wipe-downs extend appliance life more than infrequent heavy-duty cleanings. Here’s a practical cadence:
| Frequency | Tasks |
|---|---|
| After every use | Scrape grates while warm, wipe exterior surfaces, empty drip tray |
| Weekly | Check and empty grease trap, wipe cabinet faces, inspect gas hose for cracks |
| Monthly | Vacuum firebox or ash cup, clean burner ports, wipe countertop; reseal stone only if needed |
| Seasonally (spring/fall) | Full disassembly deep clean, degrease cook box, reseal stone countertops, inspect all connections |
| Annually | Professional deep clean recommended for heavy-use setups or before peak season |
Outdoor Kitchen Pilot’s cleaning routine guide recommends deep cleaning at least once or twice a year, with seasonal prep (spring opener, fall close) as the minimum standard. Skipping the fall close is the single most common reason homeowners find pest damage or corroded burners when they open up in spring.
What does outdoor kitchen cleaning typically cost?
Pricing varies by condition, location, and what’s included. Here’s a realistic range for the U.S. market:
- Grill-only deep clean: $75–$150 for a standard gas grill in average condition. Heavy carbon buildup or a large built-in unit pushes this higher.
- Grill plus hood and vent: $150–$250, depending on hood size and grease accumulation.
- Full outdoor kitchen service: $250–$500 or more for a complete island with multiple appliances, countertops, and cabinets.
What drives the price up:
- Degree of disassembly required
- Time to degrease heavily carbonized cook boxes
- Hood and vent cleaning (often priced separately)
- Travel distance and same-day scheduling
- Warranty-safe methods for premium appliances (Lynx, Napoleon, Traeger)
- Proper disposal of grease and chemical waste
Red flags on a quote: no insurance proof, no task breakdown, a flat rate with no mention of disassembly, or a price that seems too low for the scope described.
When should you call a professional instead of doing it yourself?
Some situations are clear DIY territory. Others aren’t.
Call a pro when you see:
- Damaged or corroded burners that don’t light evenly after cleaning
- Clogged burner ports that remain blocked after brushing lengthwise
- Persistent smoke or unusual odors after a thorough clean (possible gas leak or blocked vent)
- Structural cabinet damage, warped doors, or water intrusion at joints
- Electrical components near the grill that need inspection
- A warranty-sensitive appliance (Lynx, Napoleon, high-end Traeger) where DIY cleaning could void coverage
Questions to ask before booking any service:
- Are you licensed and insured? (Request the certificate of insurance, not just a verbal yes.)
- What exactly is included? (Ask for a written task list.)
- Do you provide before/after photos?
- Is there a satisfaction guarantee or a warranty on the service?
- How do you dispose of grease and chemical waste?
Trust signals to verify: certificate of insurance on file, clear pricing with a task breakdown, documented process (disassemble, degrease, sanitize), and verifiable customer reviews. A crew that offers before/after photos is showing confidence in their own work.
How Fixmovehaul handles outdoor kitchen and lanai cleaning in Southwest Florida
Fixmovehaul’s approach to outdoor and lanai cleaning in SWFL starts with an on-site inspection before any work begins. The crew assesses the condition of the grill, countertops, cabinets, and surrounding surfaces, then presents transparent package options with clear pricing.
Service options that map directly to this guide:
- Grill-only deep clean: — Full disassembly, degreasing, sanitization, and reassembly with a test fire.
- Seasonal opening and closing: Spring prep and fall close packages for snowbirds and seasonal residents, including storage prep and system checks.
Fixmovehaul serves Naples, Bonita Springs, Estero, Lee County, and Collier County. Same-day response is available for urgent needs, and the team is licensed and insured with a satisfaction guarantee on every job.
How to dispose of grease and cleaning chemicals responsibly
Grease disposal is the step most homeowners skip or handle incorrectly. Pouring grease down a household drain clogs pipes and, if it reaches a storm drain, violates local environmental regulations in most U.S. municipalities. The right method: let grease cool and solidify in the drip tray, then scrape it into a sealed container (an old coffee can or a zip-lock bag inside a trash bag) and dispose of it in the regular trash.
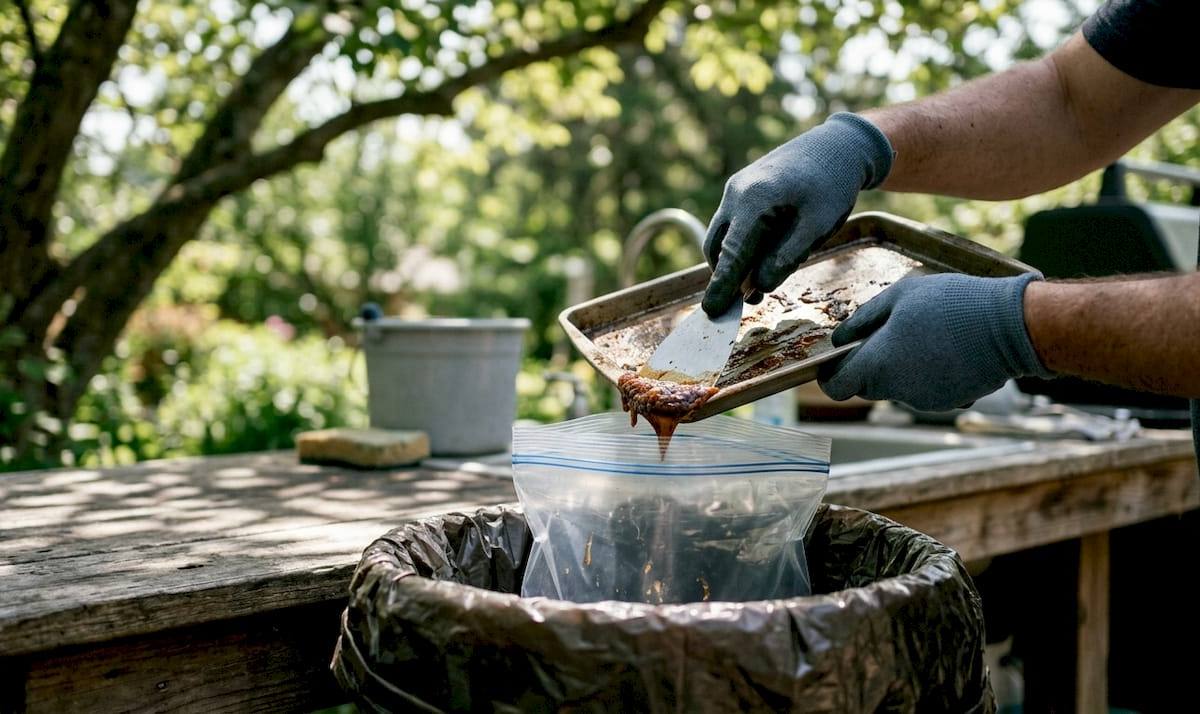
For larger grease volumes from a commercial-style outdoor kitchen, contact your local waste management provider. Many municipalities have household hazardous waste (HHW) drop-off sites that accept cooking grease and chemical cleaning residues.
Chemical degreasers and cleaning solutions should never be rinsed directly onto soil or into landscaping. Dilute heavily with water and dispose of the rinse water into a utility sink that connects to the municipal sewer, not a yard drain. Keeping a clean outdoor bin near the cooking area also reduces cross-contamination between food waste and cleaning residues.
For any appliance that’s beyond cleaning and needs removal, appliance disposal options in Florida cover the logistics of safe pickup and recycling.
How to protect your outdoor kitchen after cleaning
A clean outdoor kitchen stays clean longer with a few protective habits:
- Use a coated-surface-safe cleaner on outdoor flooring near the kitchen. Aggressive pressure washing strips protective coatings from sealed concrete floors the same way it damages cabinet joints.
Covers, sealants, and consistent post-cook habits cost almost nothing. Replacing a corroded burner assembly or a stained concrete countertop costs several hundred dollars.
Key Takeaways
A thorough outdoor kitchen cleaning routine, done consistently, prevents the kind of damage that turns a $150 deep clean into a $500 repair.
| Point | Details |
|---|---|
| Safety first, every time | Disconnect gas, power down pellet grills, and let surfaces cool before any cleaning begins. |
| Match cleaner to material | Use pH-neutral cleaners on stone, clean stainless with the grain, and avoid pressure washers near joints and seals. |
| Follow a cleaning schedule | Quick post-cook wipes after every use matter more than infrequent deep cleans; deep clean seasonally at minimum. |
| Know when to hire a pro | Damaged burners, persistent odors, or warranty-sensitive appliances are clear signals to call a licensed and insured crew. |
| Fixmovehaul covers SWFL | Fixmovehaul offers grill-only deep cleans, full island service, and seasonal opening/closing packages across Naples, Bonita Springs, Estero, Lee County, and Collier County. |
What crews actually see, and what it means for your decision
The most common mistake isn’t using the wrong cleaner. It’s skipping the burner inspection entirely. Homeowners scrub the grates, wipe the exterior, and call it done, but the burner ports are half-blocked with carbon and the igniter is corroded. The grill lights unevenly, runs hot on one side, and the next cook is a frustrating mess.
The practical rule: handle the surfaces yourself. Grates, trays, cabinet faces, and countertops are all DIY-friendly with the right tools and a bit of time. But anything involving disassembly of burner assemblies, gas connections, or electrical components on a built-in unit belongs with a professional. Not because it’s dangerous in every case, but because a mistake there costs far more to fix than the service would have cost to book.
The other thing crews see constantly in Southwest Florida: pressure washer damage. A homeowner blasts the whole kitchen in 20 minutes, and the water gets into the cabinet joints, behind the stainless panels, and near the wiring for the built-in lighting. Six months later, the cabinet doors are warped and the wiring needs replacement. A microfiber cloth and a bucket of soapy water take longer and look better.
Fixmovehaul makes outdoor kitchen care easy in Southwest Florida
Skip the guesswork of finding a reliable local crew. Fixmovehaul brings licensed, insured technicians directly to your home in Naples, Bonita Springs, Estero, Lee County, and Collier County, with transparent pricing and a satisfaction guarantee on every job.

Whether you need a single grill deep clean before a big cookout, a full outdoor island service before listing your home, or a seasonal opening or closing package as a snowbird heading back north, Fixmovehaul handles the logistics. The team inspects on-site, quotes clearly, and schedules around your calendar, often with same-day availability. Need cleaning supplies or replacement parts picked up from Home Depot or Lowe’s first? That’s covered too with local pickup and delivery.
Request a quote at fixmovehaul.com/outdoor-cleaning-swfl. Have photos of your grill and outdoor kitchen ready, along with the make and model of your appliances, and the team will come back with a specific, line-item estimate.
Selected sources and further reading
Consult your grill manufacturer’s manual for warranty-specific cleaning instructions before using any commercial degreaser on a new appliance. The sources below informed the how-to steps and material care guidance throughout this guide.
| Source | What it covers |
|---|---|
| Outdoor Kitchen Cleaning & Maintenance Guide, BBQ Host | Full outdoor kitchen maintenance, stone sealing, and professional service scope |
| How to Keep Your Outdoor Kitchen Clean, Trex Outdoor Kitchens | Stainless-steel care, material-specific cleaning, and finish protection |
| How to Clean Your Grill, Bon Appétit | Post-cook habits, warm-grate cleaning technique, and routine maintenance |
| How to Deep-Clean Your Gas, Charcoal or Pellet Grill, Weber | Manufacturer-aligned disassembly, burner care, and reassembly steps |
| How to Clean Your Grill, Food Network | Deep-clean frequency recommendations by use level |
| Outdoor Kitchen Cleaning Routine, Outdoor Kitchen Pilot | Seasonal deep-clean cadence and pest-prevention rationale |
| Cleaning and Maintaining Your Outdoor Kitchen, Theiss | Pressure washer risks, joint and seal protection, material-specific rules |
| How to Clean a Grill, Serious Eats | Component removal, ash and hopper emptying, and storage prep |